
A step-by-step detailed guide on how to create a DCP (Digital Cinema Package) on your home computer and test it with NeoDCP player.
We all enjoy watching movies at the theaters with a large bucket of Popcorn, Coke, and Nachos. But, Did you ever thought about how a new movie is delivered to your nearby theater?
And what happens inside the projection room.
Earlier, movies used to arrive at the theater in 35mm Reels, with a written note on them to give information about a particular movie. Such as its name, Director’s name, issuer, etc.
But in this age of technology, we now have Digital Cinema Package or DCP. They come in a Linux Formatted Hard Drive or sometimes through Satellite Link.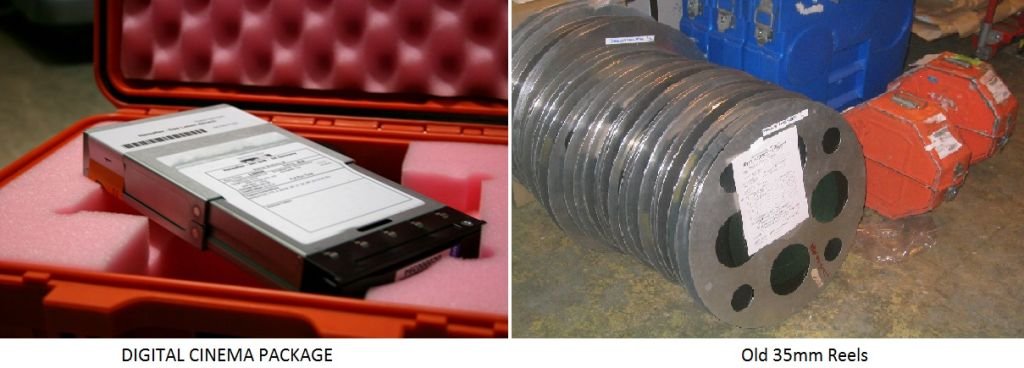
What Is Digital Cinema Package Or DCP?
A Digital Cinema Package or DCP is the digital equivalent of a 35mm film print. It is what you give to a commercial theater so that they can screen your movie on a digital projector.
Like a 35mm print, a DCP is a worldwide standard.
If you walk into any D-Cinema theater, anywhere in the world, they can play your DCP without a problem.
Benefits of Digital Cinema Package Or DCP
Due to the emergence of D-Cinema, 35mm film has nearly vanished in the last few years.
Many theaters do not have any 35mm equipment at all! Virtually all new theaters are digital only, and that means you’ll need a DCP.
The second reason is cost.
If you want a 35mm print, and your movie was shot digitally and finished on an Avid or Final Cut Pro (or any nonlinear editing system), you’ll need to do a “filmout” – the process of converting your digital files into a film print.
The cost for a feature film “filmout” is about $40,000 or more. Each additional print is about $1500.
In contrast, making a feature DCP typically costs 95% less.
With such large cost savings, it is easy to see why all the major film studios have moved towards digital distribution.
Another benefit is that DCPs don’t wear out like 35mm. Digital copies do not degrade, so you’ll never have a broken, scratched, or dirty DCP. The 1000th screening will look just as perfect as the first.
How To Create A DCP (Digital Cinema Package)
Here is the biggest problem with making your own DCPs – They can only be properly tested and viewed on a D-Cinema projector in a theater.
DCPs use a completely different color space than your computer or TV monitor. So all you can ever do on a PC or MAC is “simulate” what it will look like in a theater.
If you want to make DCPs, you’ll need to establish a relationship with your local theater so that you can test out your results.
If you are a non-profit or making a documentary, many theaters will be happy to help, possibly for free.
There are a couple of software’s that you can use to create a Digital Cinema Package on your home computer. The most commonly used and free software is OpenDCP.
Since a DCP is a package of files, the two most important files are your Video and Audio. The Video format used in a DCP is MXF and for audio, we require WAV files.
MXF is a collection of JPEG 2000 or j2k file format sequences bundled together in a single file. You can create JPEG 2000 or j2k using After Effects but it can also be done with OpenDCP itself.
Step 1 – Covert TIFF Sequence To JPEG 2000
Before processing your movie with OpenDCP, you first need to convert it into an image sequence. The most recommended format is the TIFF sequence.
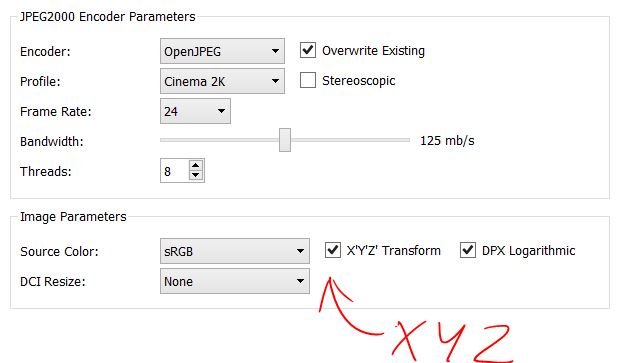
Once you have your movie converted into a TIFF sequence, start OpenDCP, and under JPEG 2000 tab, choose your profile (2K or 4K cinema), frame rate, and bandwidth.
For 2k, leave bandwidth at 125 mb/s and for 4k, increase it 250 mb/s (maximum).
The value of threads depends on the number of cores your processor will use to convert the files into JPEG 2000.
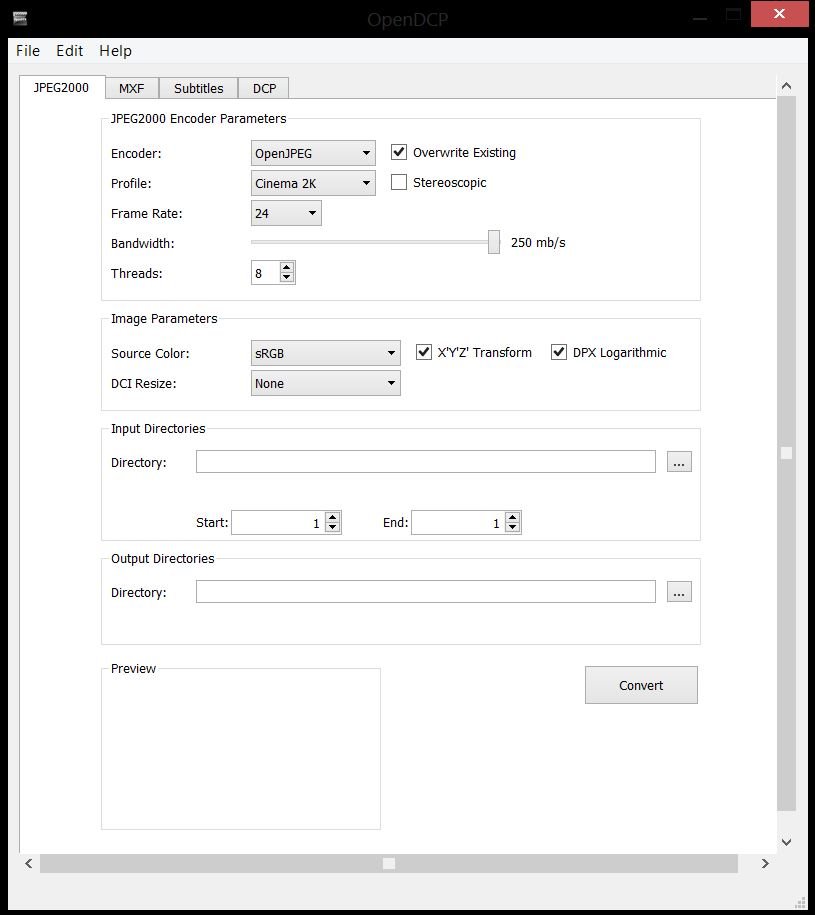
Under Input Directory, select the folder which contains the TIFF sequence.
At the output directory, select a folder where you want JPEG 2000 files to be saved after conversion.
Click on Convert to start the conversion process.
Step 2 – Setting Up MXF File Parameters
Now, you need to create a single MXF file from the recently converted JPEG 2000 sequence.
Select the MXF tab and set the type to JPEG 2000, note that you can also create MXF from an MPEG2 file instead of JPEG 2000.
Set the Label as SMPTE (Society of Motion Pictures and Television Engineers) and enable encryption if you want to secure the package with a key.
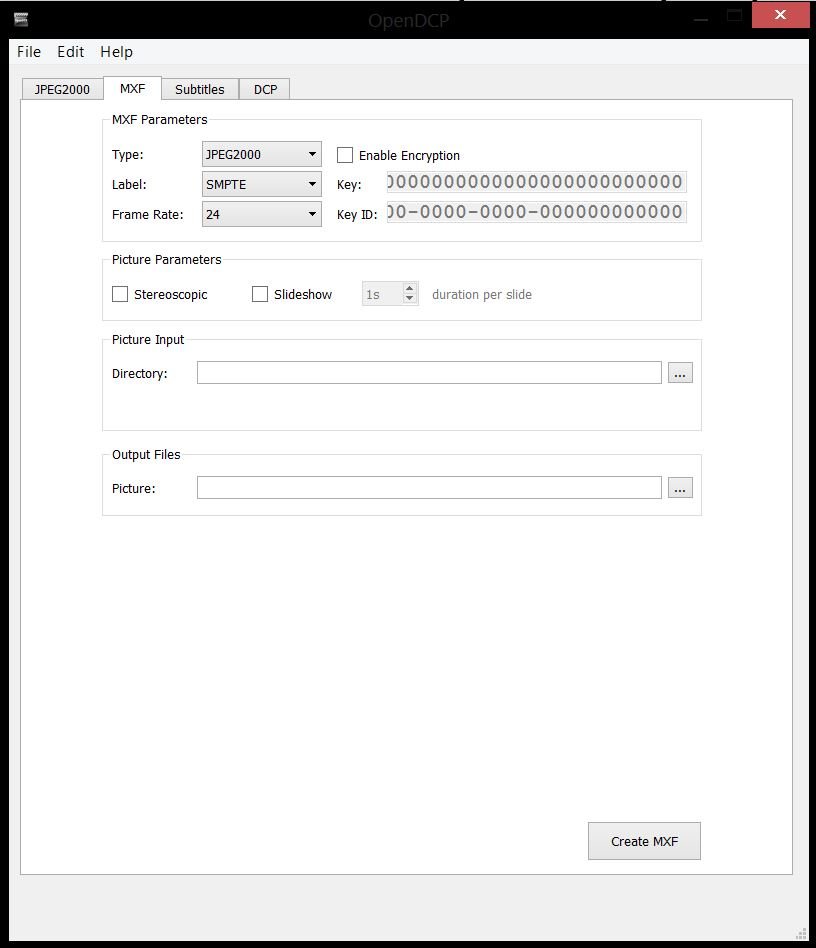
Set Picture Directory to the folder which contains your JPEG 2000 sequence and Output Files as the destination where you want the MXF file to be exported.
Click on Create MXF to start the conversion.
To create MXF of your audio, change the type to WAV, select your audio files, and convert.
Step 3 – Add Subtitles File (If Available)
There are not many options under the subtitles tab but, if you have a subtitle file for your movie, simply set the file input location and output location to create a DCP-compatible subtitle file.
Step 4 – Creating The Final MXF File
Finally, when you are creating MXF files, open the DCP tab. Here you can set the Title, annotation, issuer, and other sorts of informative stuff and XML digital signatures.
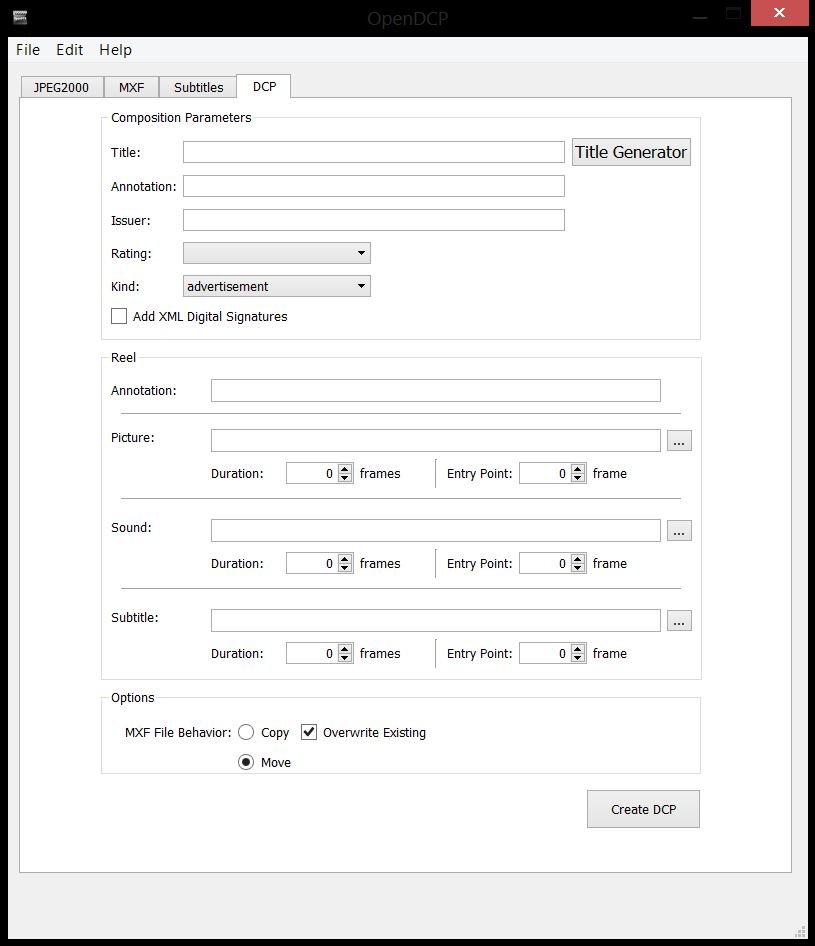
Set the Picture to the location of your Video MXF file, Sound to Audio MXF file, and subtitle file, and click on Create DCP to create your Digital Cinema Package.
Copy the DCP to a Linux-formatted Hard Drive and take it to your nearest theater for testing.
How To Test DCP (Digital Cinema Package) On Your Home Computer
Though it is very easy to create a DCP on a home computer, it is comparatively difficult to test it, mainly due to differences in color space.
If you use Adobe Premiere Pro, FCP (Final Cut Pro), or After Effects for editing and rendering, then the output files will have their source color parameters as sRGB. Similar to the color parameters of your computer.
But, in order to get the correct color space on a Digital Cinema Projector, the files need to be processed through X’Y’Z’ Transformation.
Don’t worry, the process is not as complicated as it sounds. Your DCP software will handle the job for you.
If you wish to use OpenDCP for creating Digital Cinema Package, you will find the color space transformation options under the Image Parameters section.
Now, when it comes to testing a DCP, your normal Media player will not be able to play the file for you since VLC or Windows Media Player does not play MXF file formats.
Earlier when I created my first-ever Digital Cinema Package, I was really confused about how I am going to test it since it was not possible for me to visit my nearby theater and get testing permissions.
After searching a bit online, I found a software called Stereoscopic Player.
Stereoscopic Player
The Stereoscopic Player is basically used to test 3D video and it can also play your Digital Cinema Package.
But, the main problem with this media player is that it ignores the source color space of the DCP, i.e. X’Y’Z’, and instead outputs the file in RGB Color Space.
The final result is blown-out colors. Though your files will play normally on a Cinema Projector.
Although we know that a DCP created with OpenDCP will give play normally in a theater, still one should be sure about the output before delivering the files.
The software which helped me do so is the NeoDCP Player.
NeoDCP Player
NeoDCP Player is one of the best and most stable Digital Cinema Package players that delivers accurate results and amazing features.
You can use NeoDCP Player to check and test your DCPs very easily.
It can play encrypted as well as unencrypted DCP and you don’t even need expensive hardware to do so.
Recently, NeoDCP contacted me and offered 3 months free license of the NeoDCP Player Professional version for testing purposes.
They wanted me to utilize as well as learn and discover more about the features that I was not able to access in the trial version.
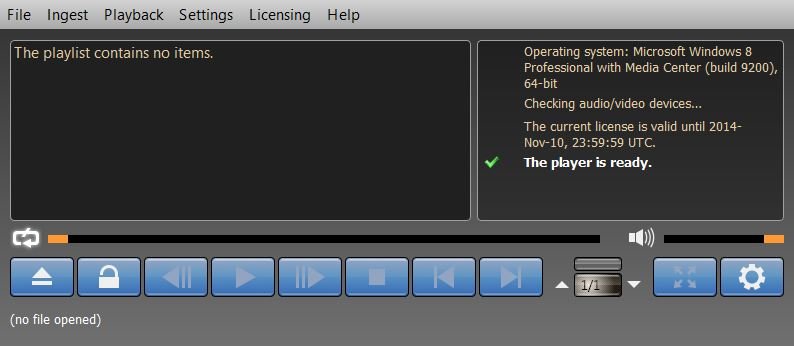
Before you run a DCP, make sure to change the color transform setting by going into Settings > Color Settings and changing the color transform to XYZ to sRGB.
Here’s how you can test your DCPs with NeoDCP Player.
Conclusion
Digital Cinema Packages are the modern and advanced version of earlier used cinema packages which come in 35 mm reels.
The advantage of Digital Cinema packages over cinema packages is that the quality of a movie always remains the same.
Also, it is much cheaper to create a Digital Cinema package and one can easily do so even with a Home Computer.
And after you are done creating the package, you can use software like NeoDCP to test it out on your home computer before taking it to the actual cinema projector.
More of a question than a reply. does anyone do 35mm film conversions to DCP? I have a 1 minute intermission ad on 35mm film that i’d like transferred to a DCP file.
any info on who might be set up to do this would be appreciated
Thank you!
As of now, I am not aware of anyone who is involved in 35mm film to DCP conversions. However, I will try my best to come up with a solution or any information that could help you with the task.
Hey there EditingCorp team! I just read your article on how to create a DCP (Digital Cinema Package) and I wanted to say how informative and useful it was.
As someone who is not very knowledgeable about the technical aspects of filmmaking, I appreciated how you explained each step of the process in detail. Your article was clear and concise, and it made creating a DCP seem less daunting.
I also appreciated the tips you provided for ensuring the quality of the DCP, such as checking the audio and video formats and double-checking the final output. These tips will definitely come in handy for anyone who is creating a DCP for the first time.
Overall, I just wanted to say thank you for sharing such a well-written and informative article. Your expertise in the field really shows, and I look forward to reading more of your content in the future. Keep up the great work!
Thank you so much for taking the time to read our article on how to create a DCP and for leaving such a positive comment! We’re glad to hear that you found the article informative and helpful..
We’re also happy to hear that you found our tips useful! Checking the audio and video formats and double-checking the final output are important steps in ensuring the quality of the DCP, and we’re glad that we could provide some helpful advice.
Thank you again for your kind words, and we appreciate your support.