Learn how a quick setting in Adobe Premiere Pro can prevent YouTube from lowering your audio loudness. Achieve the best loudness & clarity.
If you are a YouTube content creator and edit your videos in Premiere Pro, there’s a chance you might be making a common mistake, just like many other creators.
This may seem like a small error, but it significantly affects the audio loudness of your video.
In simple terms, when you edit in Premiere Pro, the audio in your video might sound loud enough to you. However, after uploading to YouTube, it may not be as loud.
You can easily check this. Go to one of your uploaded YouTube videos. Then right-click on it, and select the “Stats for nerds” option, you’ll see your video’s content loudness.
Ideally, this value should be at 0 or a bit above 0 for the best loudness. If it’s in the negative dB range, it means YouTube has lowered your audio loudness.
This happens because Premiere Pro and YouTube follow different audio loudness standards.
In Premiere Pro, the maximum loudness is 0 dB, but YouTube uses a higher standard as it measures loudness in LUFS instead of dB.
The solution is very simple.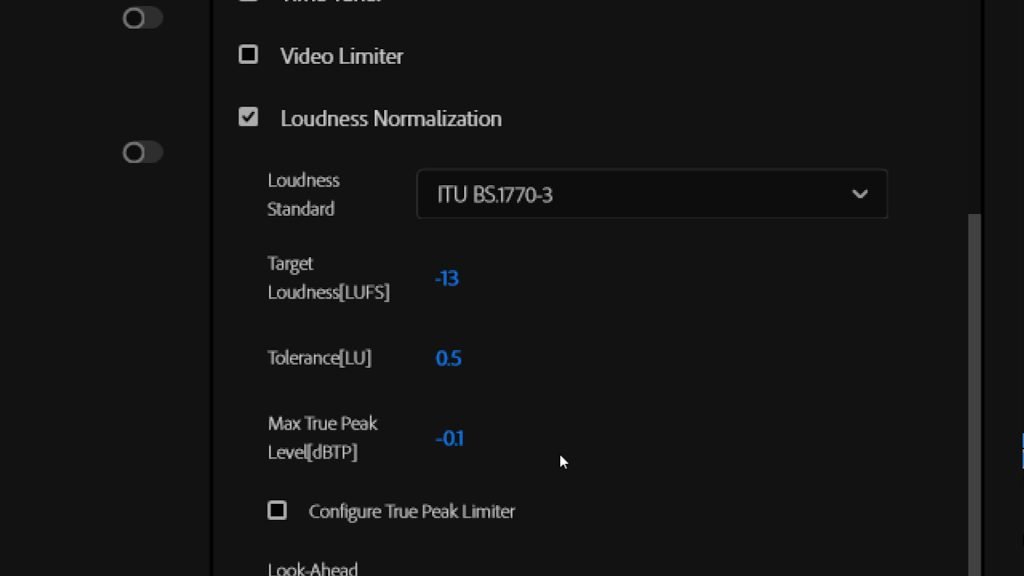
While exporting your video from Premiere Pro, go to “Effects,” enable “Loudness Normalization,” and set the Loudness Standard to “ITU BS.1770-3.” Then, set:
- Target loudness: -13
- Tolerance: 0.5,
- Max True Peak to: -0.1
After applying these settings, export your video.
Now, when you upload this video to YouTube and check the “Stats for nerds,” you’ll notice the loudness is around 0 dB in the positive range, which is perfect.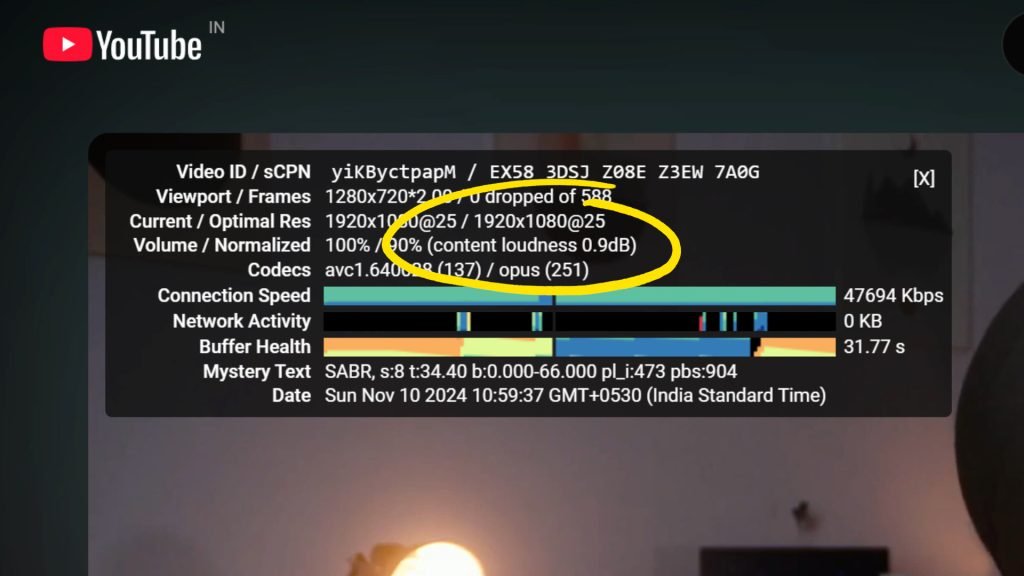
Sometimes, you may see even higher values, especially in music videos, where the content loudness is around +6 dB.
So, the key takeaway is that as long as the value is 0 or positive, your video’s audio loudness is just right.