
Learn how to create animated travel maps to showcase your journey and add visual interest to your travel photos.
Had a wonderful trip and now want to share your travel photos but in an unusual way? We have a great solution for you!
You can easily make an animated travel map that will show a visual representation of the places you’ve visited and give the viewer an understanding of the journey you’ve taken. In this article, we’ll share with you a brief process of creating such a project.
What Are The Benefits of A Travel Map Animation?
Creating a map animation can add visual interest and engagement to a slideshow or video by showing the movement or progression of information over time or space.
It can also make it easier to understand and interpret the information being presented.
Here are some reasons why one might want to create an animated travel map:
- To showcase travel experiences: A visual depiction of the locations visited can be given using animated travel maps when showcasing travel experiences.
- To make travel videos more engaging: By displaying the movement or development of details across time or space, animated trip maps can add visual interest and engagement to travel movies.
- To create a sense of journey: Animated travel maps can provide a more immersive experience by giving viewers a sense of the path taken.
Animated trip maps may enhance the immersive, engaging, and informative nature of travel narratives. They can help the audience grasp and interpret the material being presented, making the experience more memorable.
An Easy Guide To Travel Map Creation
Now it’s time to take a brief look at how to create an animated travel map. We’re going to work with SmartSHOW 3D, an animated map maker. We are convinced that the final result depends on the choice of the program because the capabilities of each software are completely different.
1. Get The Software
First, you need to download SmartSHOW 3D. This reliable tool allows you to customize the map, pins, intro, ending, music theme, and color settings. With their help and correct techniques, creating an animated travel map is pretty simple.
2. Create Your Travel Project

Now let’s proceed to the most interesting part of the process.
Choose a map from the built-in collection, which includes old-fashioned and contemporary maps with well-known landmarks, whether you need European, Asian countries, or others, you’ll find the one you like.
You can upload a map from your computer. Additionally, you can zoom in to focus on a specific section of the map.
3. Draw Your Route
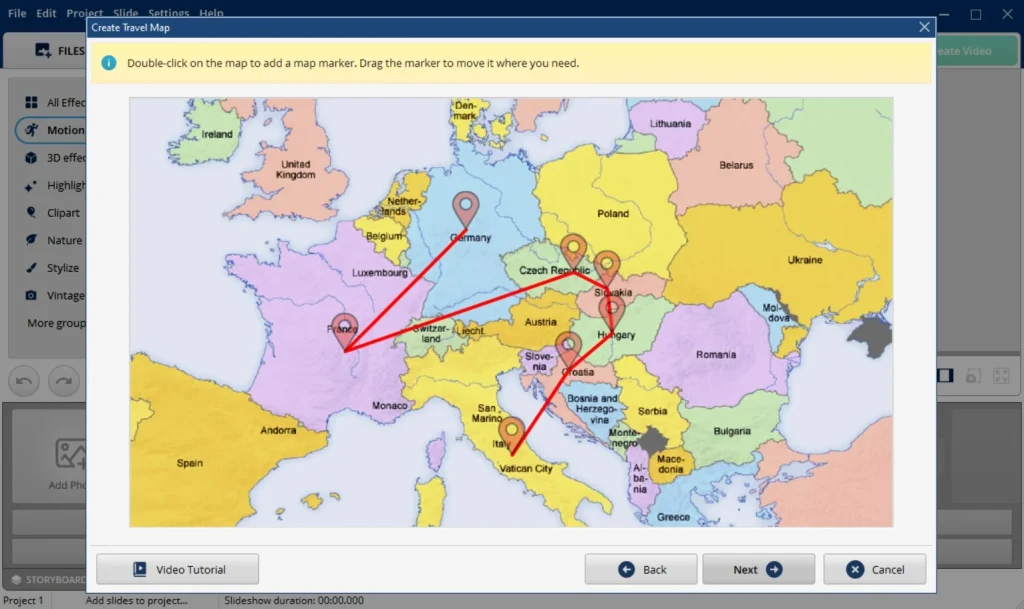
Create your trip’s route at this point. Consider the locations where you’ve been, then double-click on those places to add map marks in the corresponding chronology.
You can include as many cities and landmarks as you need. Want to show only the most important places? That’s not a problem! Just use your imagination!
4. Build Your Travel Map
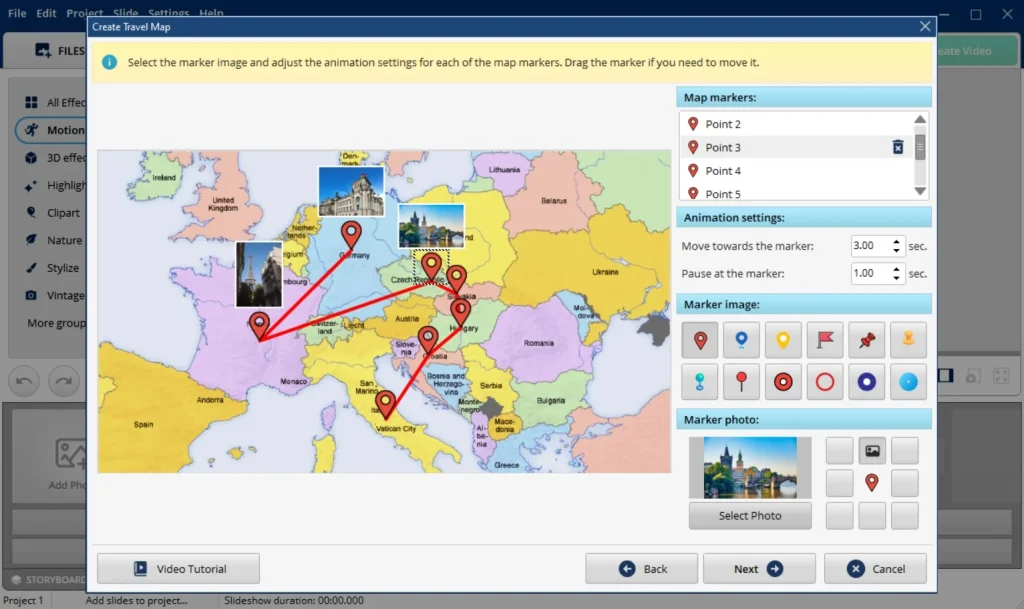
It’s time for us to get started with map animation. We can pair each marker with a matching location photo from your trip.
This image will appear next to the marker when the car icon approaches it. At the next stage of the process, you can pick the desired vehicle for your project – it can be a car, boat, airplane, or others.
You can choose different types that will correspond with your real experience.
5. Check And Save Your Creation
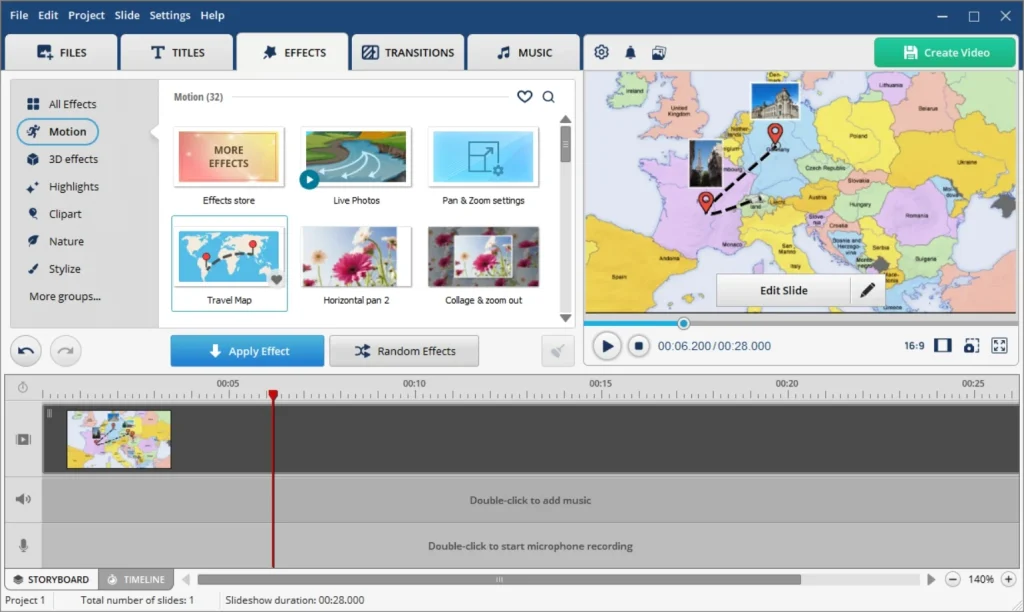
In the preview window, look at your work. To make minor changes, click the Edit Slide button.
To make your animated travel map movie more immersive, you may add sound effects. After editing is complete, export your animated travel map and use it alone or in video production.
Simply click the Create Video icon in the play screen’s upper right corner. That’s it! Now you know how to create an animated travel map in a few simple steps.
Also see: 10 Best World Map Kit After Effects Templates