


The definitive guide to creating blog post images and optimizing them for search engines because images make everything online better.
Images make everything online better. And that’s a good thing, considering how several big shifts in the social media world are now placing a bigger emphasis on using high-quality blog post images.
So, how much does adding images to your blog posts matter?
Maybe a lot more than you think.
Back in 2013, I had no idea how important blog post images really are.
They do a number of things:
- Creative images help your blog stand out. They are visually appealing and as someone once said – “A PICTURE IS WORTH A THOUSAND WORDS”.
- People tend to click on cover images that are eye-catching and colorful.
- Your blog posts and articles rank better on Google when you choose relevant images and use search-optimized captions and metadata.
- Good relevant images help people understand your blog posts as they skim the content instead of reading everything from top to bottom.
There are a number of ways, tools & techniques to create high-quality blog post images that stand out from the rest.
Online tools like Canva, Design Wizard, Fotojet, Fotor, and offline tools like Photoshop and After Effects are my primary means of creating images for my blog.
WHAT DOES RESEARCH SAY ABOUT IMPLEMENTING IMAGES IN YOUR BLOG POSTS
According to the data and research by Jeff Bullas, the world’s top social marketing talent – “Articles containing relevant images have 94% more total views than articles without images“
Also, 60% of online readers are more likely to convert into potential customers when an image shows up in local search results.


VISUALS ARE VITAL. Using images in your blog posts or articles can definitely give a boost to page views.
But…
According to data from Skyword, certain content categories benefit more from having images than others.
News, Politics, and Sports content are the three top categories where relevant images are more likely to perform and rank better in terms of page views and social media shares.
Picture Superiority Effect
Data also shows that certain psychological principles in blogging help understand the behavior of users. One such psychological principle is called the Picture Superiority Effect.
In simple terms, pictures are superior to words as visual information can be processed 60,000 times faster than text and is easier to remember.
Wherever necessary, try to use pictures instead of text, as shown in the figure below.


Apply This Principle To Your Blog Posts
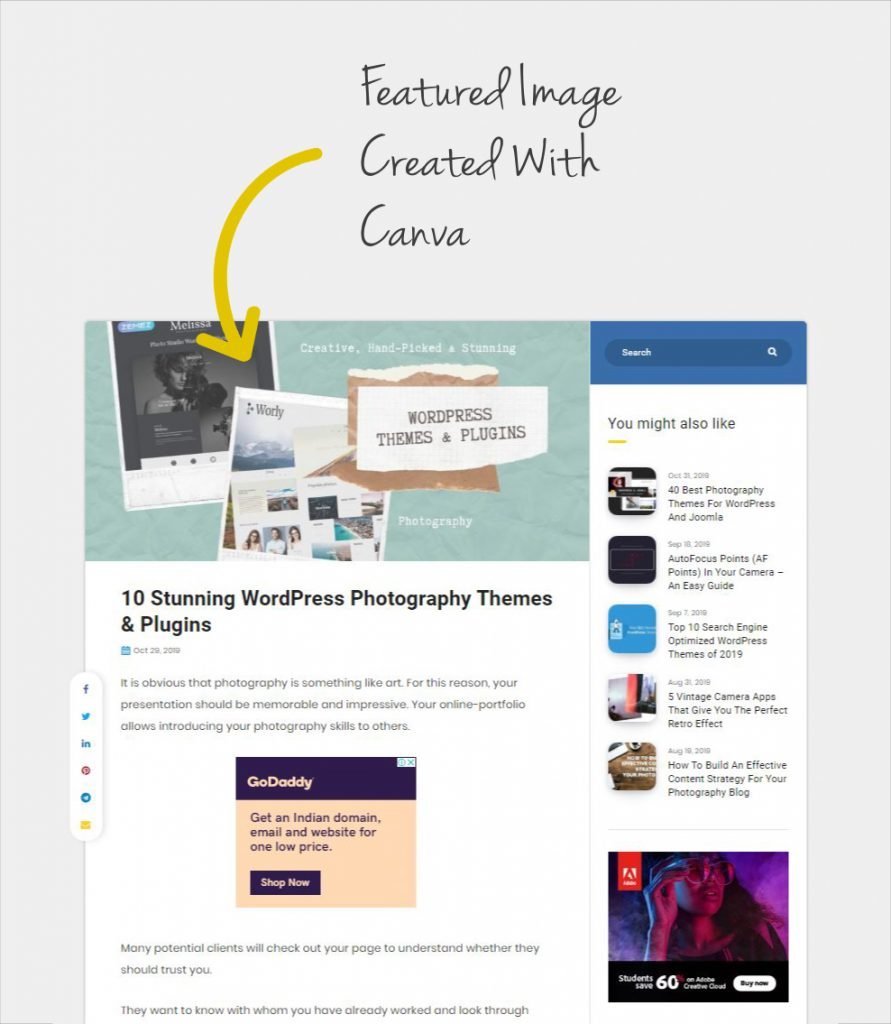
Your blog post’s featured images are no less than branding elements for your blog.
A unique and creative image will not only pull readers into the content but also get them to remember that they’ve heard of the post before.
And because of the picture superiority effect, they are more likely to remember the blog post’s featured image than the title itself.
BEFORE YOU START
Before getting started, I would like to share with you some tips and ideas to create awesome blog posts featured and in-article images.
- Pick a theme and hook on to it. Decide on a color palette and use it every single time. Treat your blog as a brand.
- Use colorful icons and vectors instead of real-life stock images.
- Go for the complementary color scheme. This includes a base color and its complement. The base color is the main and dominant, while the complementary color is used only as an accent.
- Image sizing is one of the main factors to keep in mind when creating images for your blog posts. The recommended image size for Facebook sharing is 1200 by 630 pixels while that of Twitter is 1024 by 512 pixels. I recommend installing and using the Yoast SEO WordPress plugin. It allows you to add separate featured images for your Blog, Facebook, and Twitter thumbnails.
- Optimize your images for faster loading. Create images that are high-quality but low in size. There are plugins that automatically compress images upon uploading. SMUSH is one such WordPress plugin when it comes to compressing images without compromising quality.
- Last but not least – Do not clutter your images. STAY MINIMAL.
ONLINE TOOLS AND WEBSITES FOR CREATING BLOG POST IMAGES
There are numerous websites and tools for editing and creating images online. Let’s take a look at some of the best online tools for creating blog post images.
Canva
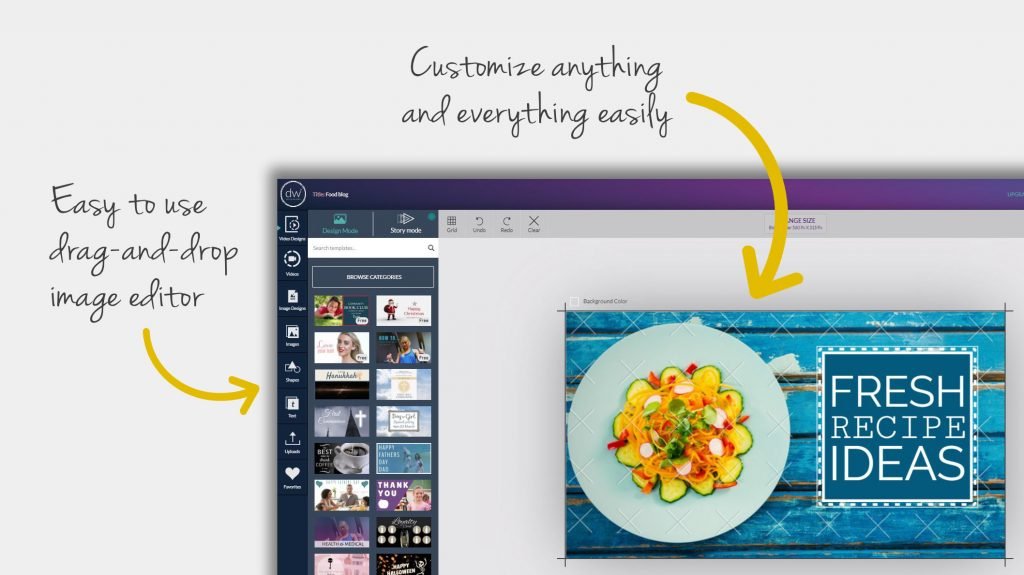
Canva is what I use all the time. Almost 80% of my blog post’s featured images come out of Canva’s drag-and-drop online image editor.

Tons of customization and sizing allow you to create stunning images, charts, graphs, and more with thousands of beautiful layouts.
Canva is free to use the tool but you can always upgrade to more professional features with Canva Pro. You get access to 4+ million photo illustrations & icons when you upgrade.


Using Canva is very easy. An interactive tutorial will guide you through the step-by-step process of designing your images when you first signup.
Being a drag-and-drop editor, everything else is pretty straightforward.
You choose a template or start with a blank page, add your elements, images, text, and everything else, click on Download and it’s done.
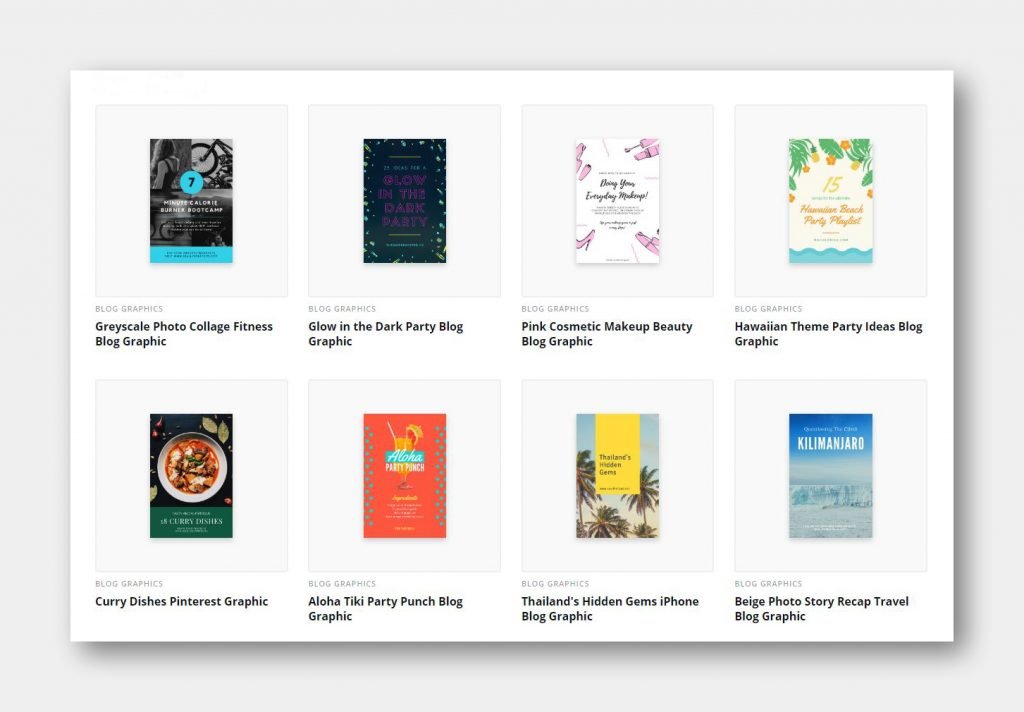
Canva Offers Thousands Of Blog Design Templates
Although limited to the pro version only, Canva has thousands of stunning blog graphics with multiple sizing options and branding kits.
This helps in getting an overall consistent look across all your blog posts.

Canva Is Best For Designing Data-Rich Graphs And Diagrams
Readers are more likely to share blog posts and articles on social media that contain graphs, charts, or diagrams.
So next time, make sure to convert all your numerical raw data into graphs that are both visual and easy to understand.
And Canva is your one and only tool for the job,


It offers more than 20 professional types of graphs with tons of customization and options, so you can get the look you want.
Canva’s Graph Maker is all you need to create visually appealing graphs and charts for your blog posts.
How To Use Canva
This tutorial video by Sara Nguyen on Canva shows you how to navigate Canva to create beautiful and stunning graphics quickly and easily.

Once familiar, you can use the tools and techniques shown in the video to create images for your blog posts.
That’s what I did. And so should You!
Design Wizard
Design Wizard is a unique content creation tool. An easy-to-use image editor with a premium template library makes it a great choice for creating blog post images.
Each and every element in Design Wizard is editable. It’s similar to Canva with additional benefits of Promo and Shutterstock.
What I like about Design Wizard is the separate library of Blog Header templates


Select the one that suits your needs and it will take you directly to a drag-and-drop style editor.
Here you can change the background, colors, fonts, add images, and everything else to create a perfect-looking image for your blog posts and articles.

The images you create can be downloaded in print or web quality. Everything is as easy as pie.
Using Design Wizard To Create Designs That Align With Your Brand
It is essential to keep consistency across all your images if you want to grow your blog/website as a brand.
With Design Wizard, you can create custom color palettes to create designs that align with your brand. This allows you to choose the same set of colors for all your images.

This ensures consistency as it makes your blog feel more dependable and readers trust and return to blogs/websites they recognize.
How To Use Design Wizard
I bet you don’t need a guide to start using Design Wizard but if you do, this official tutorial will help you get started.
Take a look!
The integrated website tour will also guide you step-by-step when you sign up.
Fotor
Fotor is another great online tool I use to create featured and in-article images for my blog posts.
It is quite similar to Canva. Even the UI looks the same.
I used Fotor Pro before moving on to Canva (It’s just a personal preference). It is no good or bad. Both Fotor and Canva offer tons of designs and customizations.
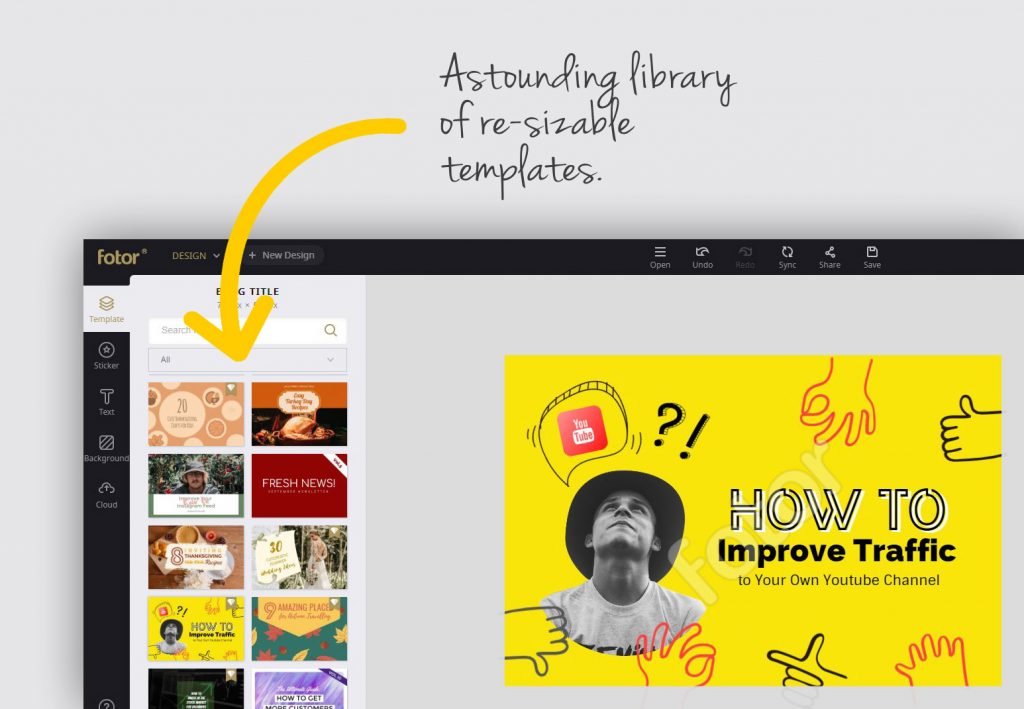

Fotor has an astounding library of templates to choose from.
You can interact will all graphics, text, and photos. You can even upload your own photos for a customized and personal feel.
How To Use Fotor
Again, when you first sign-up, a step-by-step tour and interactive guide will help you design your images. But you can dig deeper with this official tutorial video.

DesignCap
DesignCap is an online graphic design tool that makes all of your graphic design jobs much easier. It is engineered to simplify the cumbersome process of graphic design and reduce costs dramatically.
DesignCap is loaded with a number of templates and hands-on tricks that helps you create your ideal design in less than the anticipated time period.


It comes with a huge range of functions and features, some of them being:
- Thousands of professionally designed templates that help you easily create infographics, presentations, posters, flyers, social media graphics, and more.
- Built-in fonts, shapes, and backgrounds, as well as a large library of stock photos and icons.
- Dozens of modules that visually combine images, icons, and text into a cohesive whole, make visual design easier and faster.
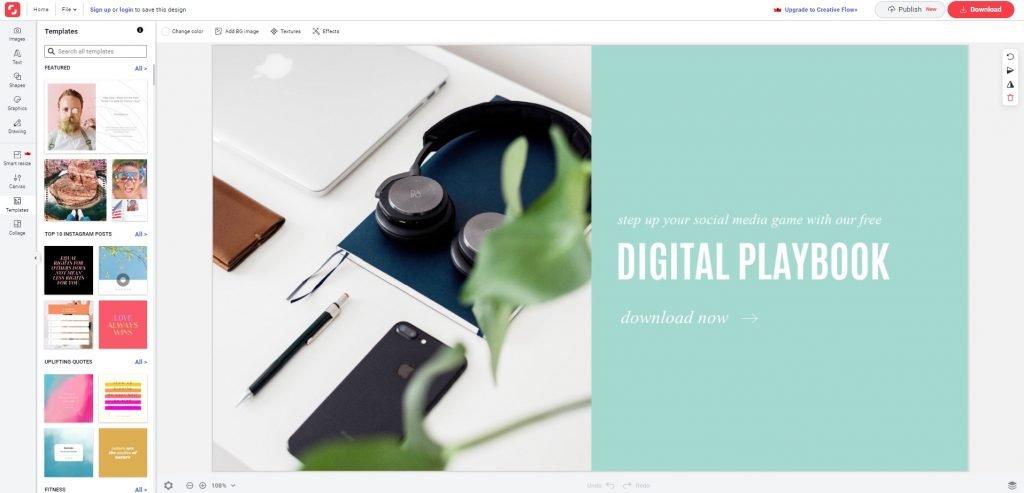
CreativeFlow+
CreativeFlow+ is an AI-powered Suite of design applications that you can use to design stunning images for your blog posts.
It offers easy-to-use editing tools to customize visuals by adding text, swapping colors, removing backgrounds, and more. CreativeFlow+ also offers thousands of pre-made templates that you can further customize with your media.

Some of the main features of CreativeFlow+ are:
- Shutterstock Create: A new suite of creative editing tools with thousands of ready-to-go design templates
- AI-Powered Search: Locate the imagery predicted to perform best for your audience and objectives.
- Predict: Discover which specific creative decisions will pay off for your future campaigns, thanks to data-backed insights and intelligence.
The suite of CreativeFlow+ tools is available for free to all Shutterstock Image subscribers and can also be purchased as a stand-alone product for $12.99 per month or $119 for one year. Users can also sign up for a 30-day CreativeFlow+ Free Trial.
Just visit the CreativeFlow+ website and start designing stunning visuals for your blogs.
Crello
Crello is an online image editing tool that includes a collection of 60 million+ photos and 10,500+ design elements, which you can use for your blogging needs.
Creating a header, featured, or in-article image with Crello is very easy. In just 4 simple steps, you will have breathtaking visual content to attract more visitors to your blog.
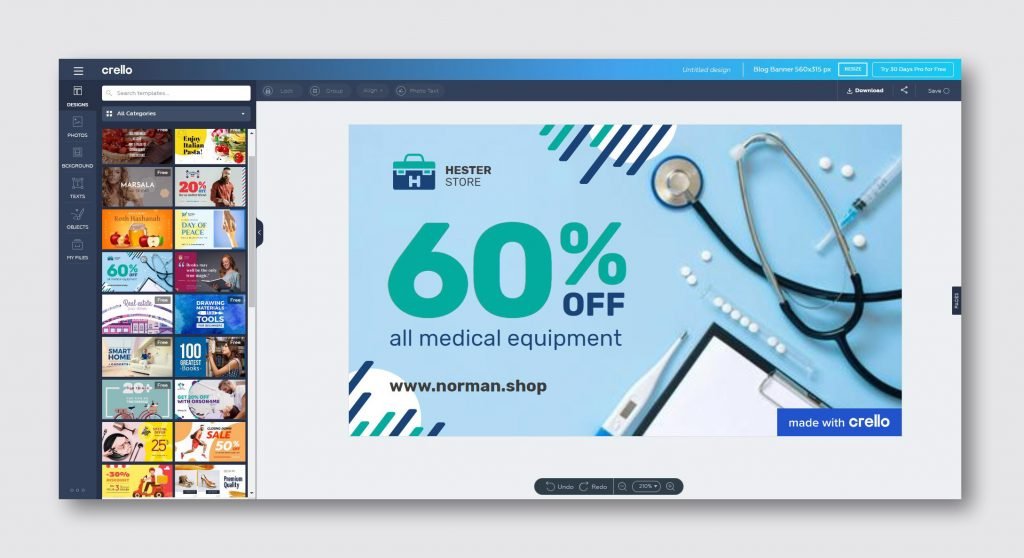

The look, feel and functionality of the Crello image editor are the same as Canva and Fotor.
“Crello is easy to use with no prior design knowledge or experience. I was tasked with making marketing materials and found this program. Crello helped me and gives me readily available tools to make my job easier and look more professional”, says Melissa.
Head over to the Crello website to create stunning images for your blog posts.
OFFLINE TOOLS & ASSETS FOR CREATING BLOG POST IMAGES
Sometimes, instead of using above mentioned online tools, I use Photoshop & Adobe After Effects
Going offline has its own benefits. It gives flexibility and freedom to customize everything.
Your blog post images will look unique and brand-centric. The job gets a lot easier with pre-made typography and font bundles.
Fonts, Typography & Background Assets
I am a big fan of Jenne Sue’s handwritten font. Therefore, I use it in almost all my blog post images. The best part – IT’S FREE.
Other than that, I have a collection of premium fonts, typography, and background bundles that I use in combination to create unique and creative images for my blog posts.
Let’s take a look at the top 3 bundles I use.
Handwritten Fonts Bundle

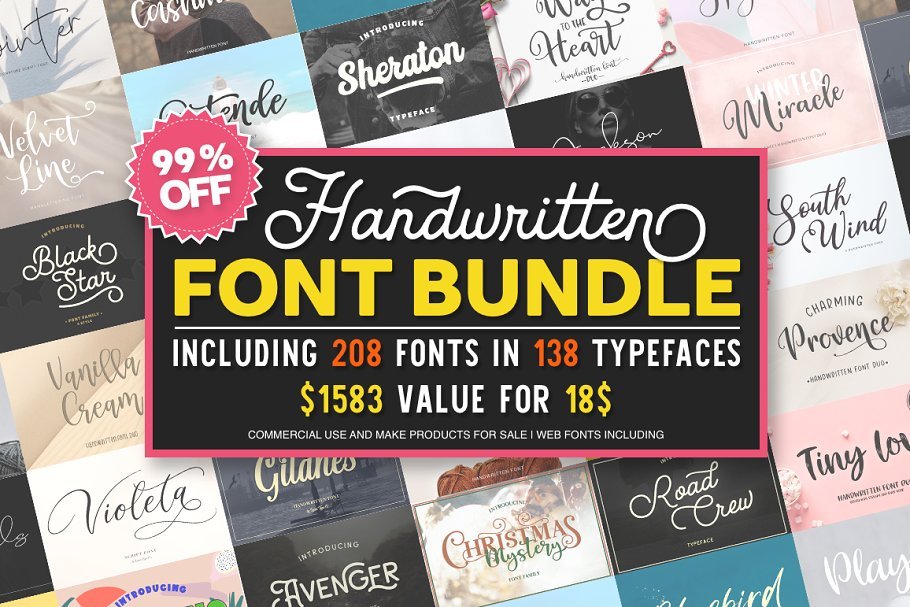
The bundle contains 208 fonts packed in 138 typefaces.
This font bundle includes a varied range of font styles such as calligraphy, signature, brush lettering, layered, fun, display, vintage and lettering, and more. Many have alternates, ligatures, and swashes.
Huge Typography Pack

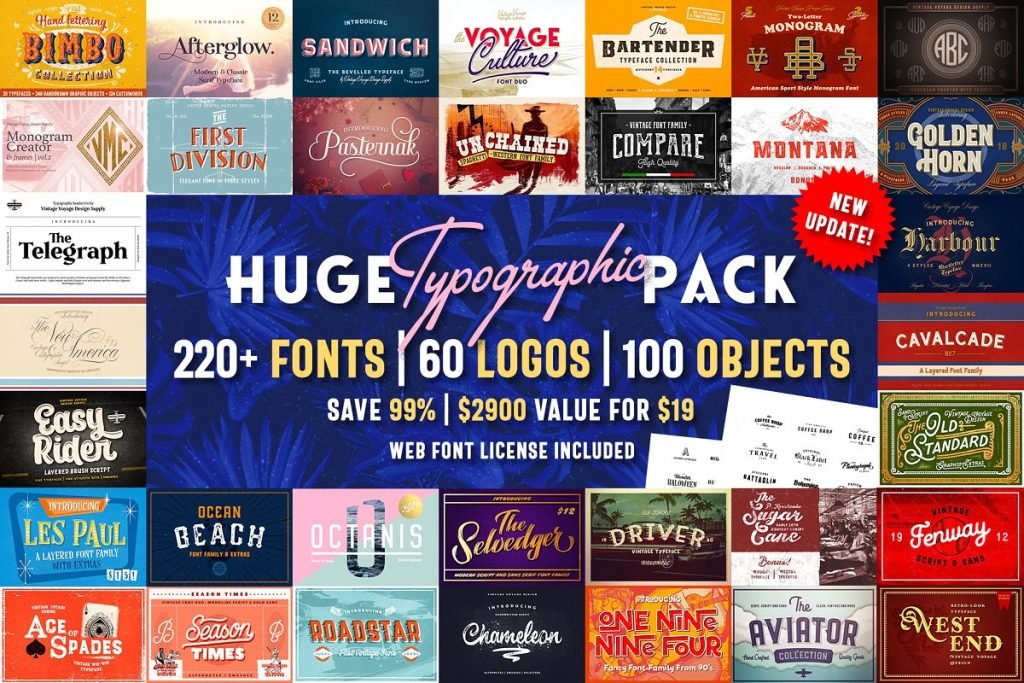
Huge Typographic Pack has a wide selection of different styles. Thus, you are sure to find what you need.
For instance, the pack includes Regular, Light, Bold, Condensed, Serif, Sans, Script, Slab, Monograms, Cartoon, and Fancy typography.
Abstract Backgrounds & Patterns
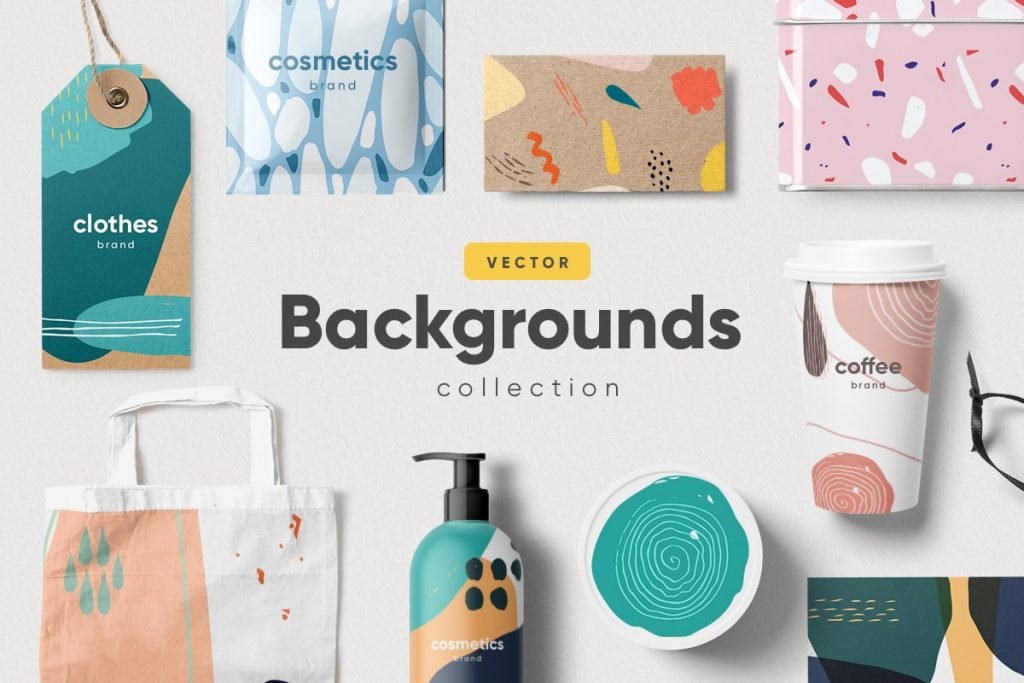
This background collection pack is great for creating featured images for your blog posts.
When used in combination with a typography and font bundle, you can create some really cool and unique images.
Free To Use Vectors, Photos & PSD
Freepik.com is a great online resource to download high-quality and free vectors, photos, icons, and PSD files for creating customized blog post images.
All major companies and brands like NASA, Amazon & Microsoft use Freepik resources.
Freepik.com features more than 5 million graphic resources and a lot of them are absolutely free to download.
CREATE AND USE INFOGRAPHICS
Embedding infographics in your blog posts makes them 3 times more shareable. Optimize them for search engines (See next section for Image SEO) and you will surely see a boost in organic and social traffic.
I also include an embed code below my infographics for other bloggers to use in their blog posts.
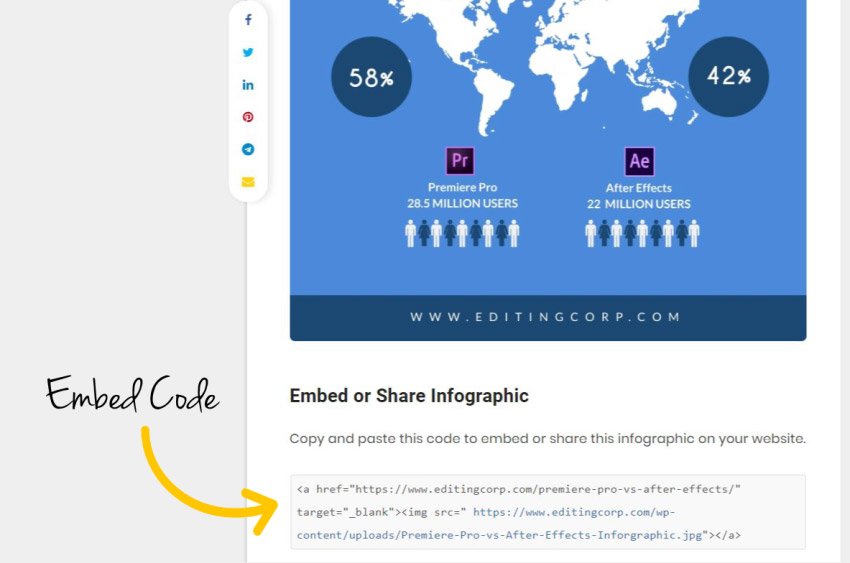

It is very basic HTML code. Just copy the code below and replace the page URL and image URL with your links.
<a href="ADD YOUR BLOG/PAGE URL HERE" target="_blank"><img src="ADD YOUR IMAGE URL HERE"></a>
Using Infographics in your blog posts and articles is an easy way to get backlinks, social shares, and traffic.
How To Create Infographics
Creating Infographics isn’t as complicated as it sounds. You can use Canva, Design Wizard, and other tools listed above.
Canva Infographic Maker has a good collection of Infographic Templates. It’s free and easy to use.
Other online tools you can use are Piktochart & Visme.
Piktochart


Piktochart is my most used Infographic maker. Almost all my infographics are generated with Piktochart.
Why?
Firstly, it’s free to use (Although there is an upgrade that unlocks some additional features ).
Secondly, Piktochart Infographic templates look modern, clean, and professional.
Lastly, Piktochart is easy to use and you can create Infographics in just 5 easy steps.
Visme

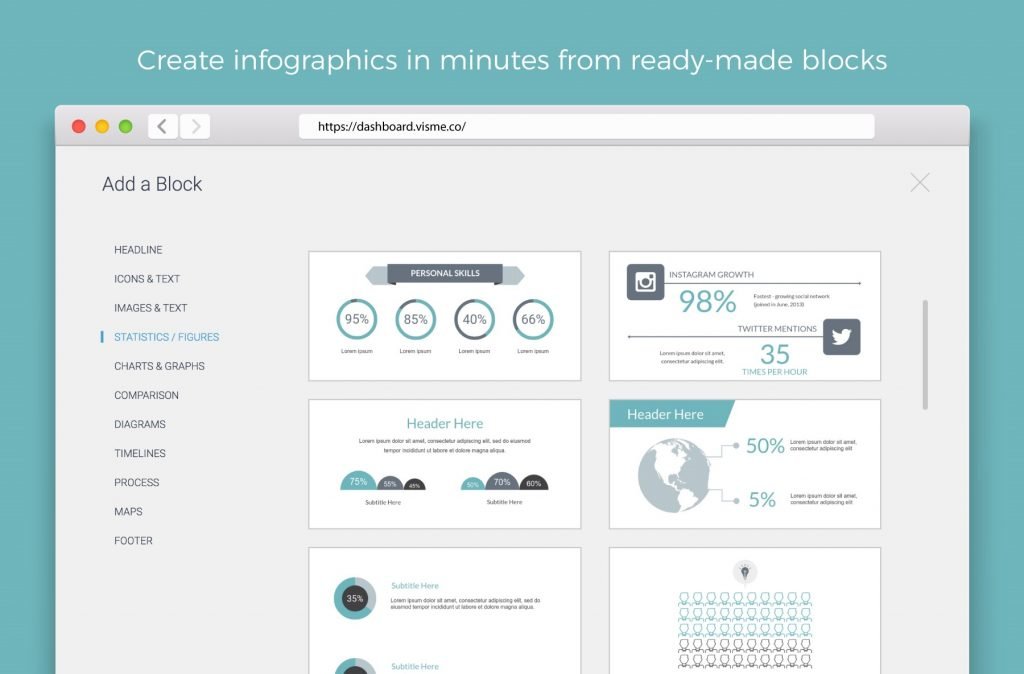
Visme is the only application that allows full capacity to create powerful and real infographics from one app and one learning curve.
It also takes things one step further allowing one to add interactivity to projects by adding video, audio, and even third-party widgets to embed into projects to name a few.
Its interface is so intuitive that users feel right at home after a few minutes of use.
Its easy-to-use features and tools make traditional tools feel complex and outdated.
Not only can you access hundreds of beautiful custom-built infographic templates; but you can also now start from a blank canvas and access a large library of content blocks that you can stack on top of each other and easily customize to build your own custom infographic in minutes not hours.
Other Tools To Create Infographics
Apart from Canva & Piktochart, there are many other tools and software to create long-form graphics.
Some of the best ones are:
- Easel.ly – Easelly is a simple infographic maker that lets you visualize any kind of information.
- Visualize. me – With over 1 million infographics created, Vizualize. me is the number one infographics maker for resumes.
- Infogram – Infogram is an intuitive visualization tool that empowers people and teams to create beautiful content. Create engaging infographics and reports in minutes
- Venngage – A tool that helps tell your stories and present your data with infographics.
OPTIMIZING YOUR BLOG POST IMAGES FOR SEARCH ENGINES
There is a number of things to keep in mind and steps to take when it comes to optimizing images for your website, blog posts, and search engines.
Let’s take a look at them one by one.
Optimizing Images Before Uploading
Now that you have your perfect blog image in hand, it’s time to upload it.
But wait…
There is a number of things you need to think about:
Choose The Right File Name
Image SEO starts with naming your images correctly. The file name should be such that it defines what’s in the image.
For example, if your image shows a product say a pair of white Nike shoes, the file name shouldn’t be DSC1782.jpg, but white-nike-shoes.jpg.
This will help the search engine to understand what the image is about and serve it to the users searching for white Nike shoes.
Choose The Right Image Format
For me, the right image format depends on the kind of image I am using and how I want to use it.
Generally, I use JPEG for all my images. It gives good results in terms of colors and clarity with a relatively small file size.
Use PNG only if you want to preserve background transparency.
Other than JPEG and PNG, you can also use WebP as it will produce high-quality results with smaller file sizes.
By default, WordPress CMS does not allow you to upload and use WebP images due to security reasons.
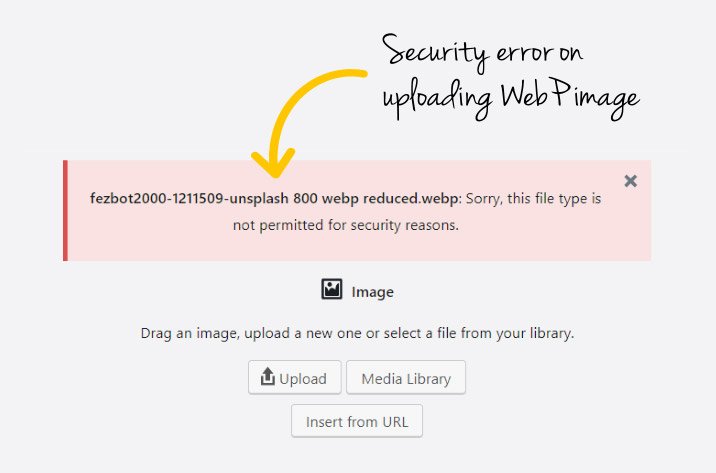

An easy and free alternative is to use EWWW Image Optimizer WordPress Plugin. It converts and generates the WebP version of your JPEG and PNG images.
Compress Images To Reduce File Size
The most important thing in Image SEO is to reduce the file size of your images. There is a number of ways to do that.
Firstly, you can use an online image compression service like Compress JPEG. It is free and easy to use.
Or, you can use tools like jpeg.io or kraken.io to reduce the file size of your images by removing the EXIF data.


Another thing I highly recommend is installing Smush WordPress Plugin. It automatically compresses all the images you upload to your WordPress CMS.
Optimizing Images After Uploading
Now that your image is ready to use, adding it to the blog post is the first and foremost step.
Don’t just throw it anywhere. Instead, add it above or below the related textual content. Make sure the text is relevant to the image as the image is to the text.
Add Relevant Captions
The image caption is something we all are familiar with. It’s a textual piece of content that accompanies the images in your blog posts.


Captions under images are read on average 300% more than the body copy itself. Not using them means missing out on an opportunity to engage a large number of potential readers.
But it doesn’t mean you need to add it to every image. You should only add a caption where it would make sense to the visitor.
Add Alt Text
Alt Text (alternative text) also known as Alt Tag is added to the images so there will be a descriptive text in place if for some reason the image can’t be displayed.
People will visual impairment rely on screen readers and Alt Text ensures that no information is lost.


So be sure to add alt text to all the images you upload. It should include what’s in the image along with your SEO keyphrase.
In other words, the textual information should be relevant to the image.
CONCLUSION
In conclusion, Images are the most important part of any blog. Research and data have shown that articles with images get 94% more total views than articles without images.
VISUALS ARE VITAL. So make sure to create high-quality and relevant images for all your blog posts. Use the psychological principle of the Picture Superiority Effect. Wherever necessary, try to use images in place of text.
There are tons of online and offline tools to create creative and engaging blog post images. Try Canva, Design Wizard, Fotor, or others, and stick to the one that suits your needs.
Treat your blog as a brand. Therefore, try to maintain consistency with your image colors and themes.
Include Infographics in your blog posts to increase social shares and traffic.
Lastly, optimize all your blog post images for SEO with the proper file name, format, scale, and image size. Add captions and relevant Alt Text/Alt Tags to all your images.