


Follow this step-by-step guide to convert vertical videos to horizontal effortlessly and make your content shine.
Whether you are an avid videographer or an aspiring enthusiast, you know that you have two options – shoot either vertically or horizontally, as some platforms prefer one over the other.
For instance, Instagram and TikTok are more suited for vertical videos. But what if you want to publish a successful TikTok clip on, let’s say, YouTube that favors a 16:9 aspect ratio?
Then you might run into issues, such as annoying black bars or awkwardly cropped footage. But there is a solution! Thanks to software becoming more powerful and accessible, you may convert a vertical video to a horizontal (and vice versa) rather easily.
All you need is a good program for the job. We will use Clipify as an example. It offers plenty of tools and features, from over 400 one-click effects and filters to Chroma Key, color curves, and more. At the same time, it is quite user-friendly and free.
So, download a copy, and let’s see how to turn a vertical video into a horizontal one!
Step 1 – Getting Started
Clipify is available for the latest versions of Windows, as well as older ones down to 7. Install it on your PC. Then run the program and select a new project from the starting screen. Then create a Blank Project.


Step 2 – Add Vertical Footage
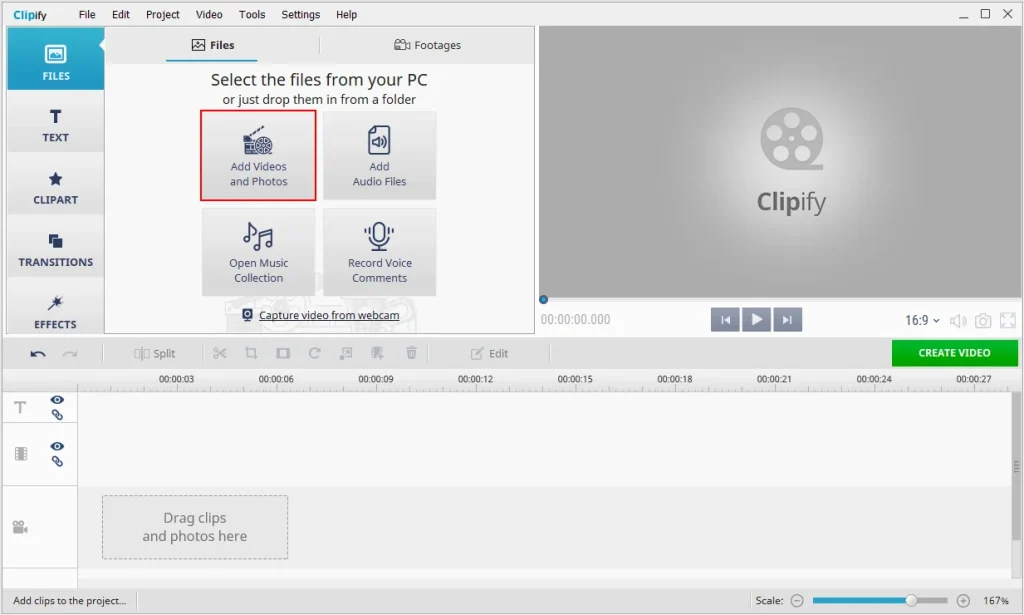
In the Files tab (it is open by default), click the Add Videos and Photos button to open the vertical video you want to edit via the file browser. Or simply drag and drop a clip into the program window.
Step 3 – Make It Horizontal
Now, go to the toolbar and click the Crop button. In the new window, select 16:9 from the Aspect Ratio drop-down menu. Preview the result – to make sure that the video is framed properly, move the cropping grid where you need it. Then hit Save to apply the changes.

Step 4 – Add Enhancements
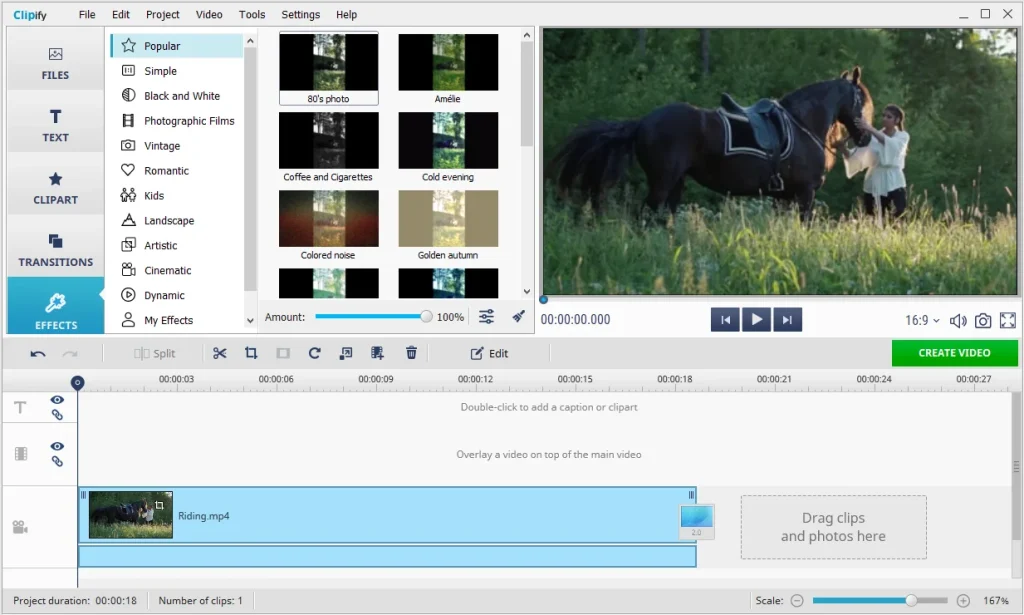
Once you have changed a video from vertical to horizontal, you may apply further edits – enhance colors with a one-click tool, reduce shaking, adjust the volume of the audio track, and so on. But this is up to you.
Step 5 – Save Your Work
When you have done all the necessary editing, click the Create Video button under the preview window. Then select a video format and adjust the quality setting. You can also select a preset designed for publication on a specific platform, such as YouTube. Done!
