
Discover step-by-step methods to safely clean your camera lenses and sensor, ensuring sharp and clear photographs every time.
Dust specks, smudges, and tiny particles, nothing can be more frustrating than finding unwanted spots ruining that perfect shot you took.
Keeping your camera’s sensor and lenses clean is not just about aesthetics; it’s crucial for maintaining the quality of your images. But fear not! Cleaning your camera equipment might seem daunting, but with the right techniques, it can be a breeze.
This blog post will guide you through simple steps to clean your camera lenses and sensors with ease.
Cleaning Your Camera Lenses
1. Gather The Necessary Tools
Before you begin, ensure you have the following items:
- Lens cleaning solution or distilled water
- Lens cleaning tissues or microfiber cloth
- Lens brush or air blower
- Lens pen (optional)
2. Use Air To Remove Loose Particles
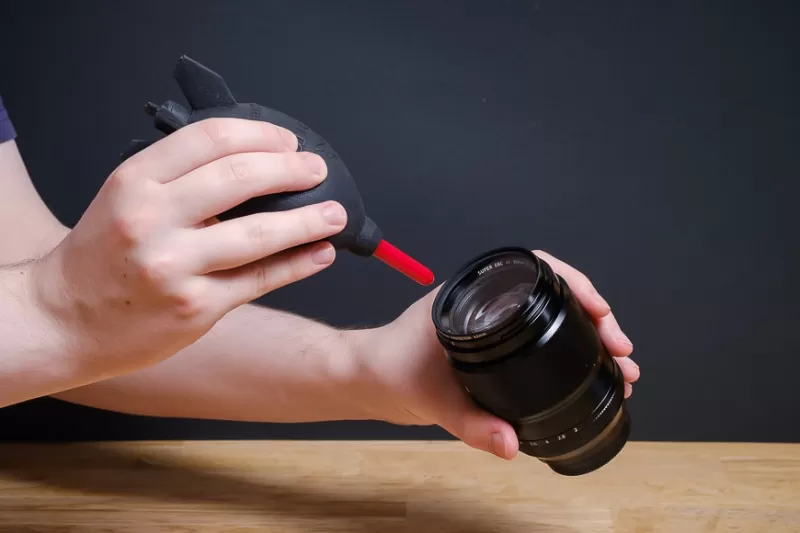
Start by using a blower to gently blow away any dust or loose particles from the lens surface. Avoid compressed air cans as they can introduce chemicals or moisture.
3. Brush Away Finer Particles

With a soft-bristled lens brush, gently sweep away any remaining dust particles. Always move from the center of the lens outward.
4. Wet Cleaning For Stubborn Smudges
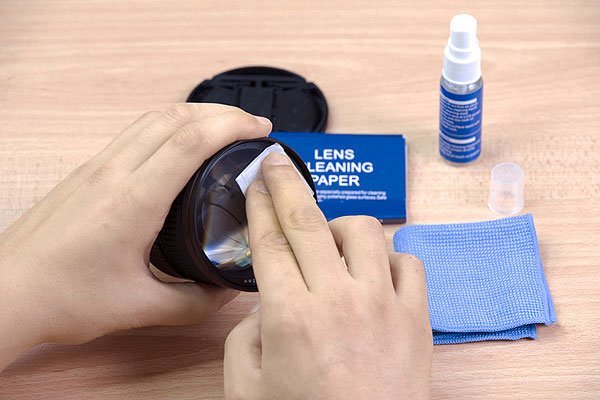
If there are smudges or fingerprints, dampen a lens-cleaning tissue or the corner of a microfiber cloth with a few drops of lens-cleaning solution or distilled water.
Gently wipe the lens in a circular motion starting from the center and moving outward. Avoid using regular tissue or clothing as they can scratch the lens or leave lint.
5. Dry The Lens
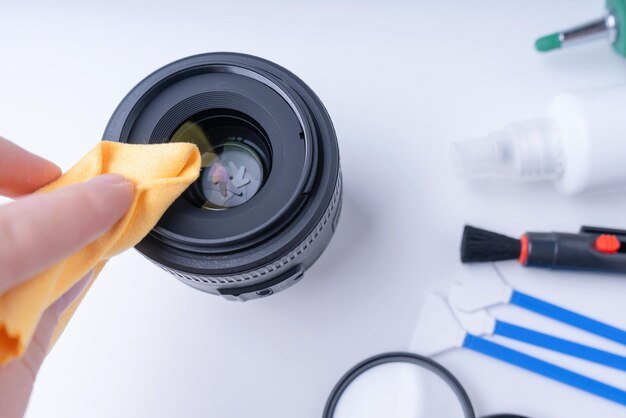
Using a dry section of the microfiber cloth, gently wipe away any excess moisture. Let the lens air dry for a few minutes before attaching the lens cap.
6. Clean The Lens Cap And Rear Element
Follow the same steps to clean the rear element of the lens and the inside of the lens cap. Dust from the lens cap can transfer to the lens, so keeping it clean is essential.
Cleaning Your Camera Sensor
Cleaning the sensor carries a risk of damaging it. If you’re not comfortable, consider seeking professional cleaning services.
1. Prepare Your Workspace
Choose a clean, well-lit, and dust-free environment. Ensure your camera’s battery is fully charged.
2. Necessary Tools
- Sensor cleaning solution
- Sensor swabs (specific to your camera’s sensor size)
- Air blower
3. Set Your Camera To Sensor Cleaning Mode
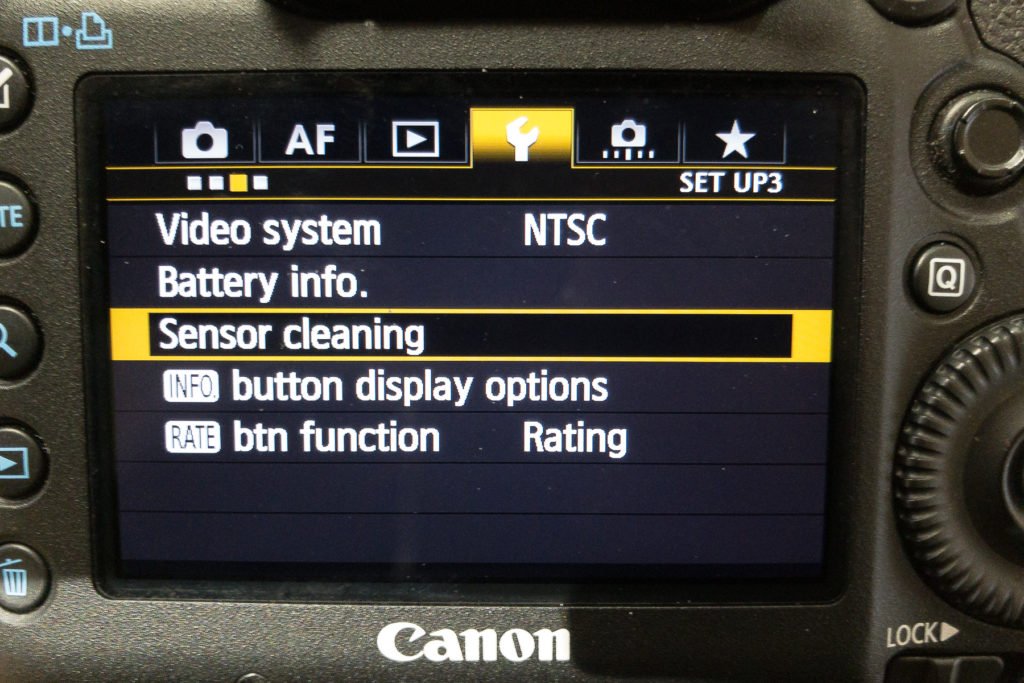
Most modern cameras have a sensor cleaning mode that lifts the internal mirror (for DSLRs) and exposes the sensor. Refer to your camera’s manual for instructions.
4. Use Air To Remove Loose Dust
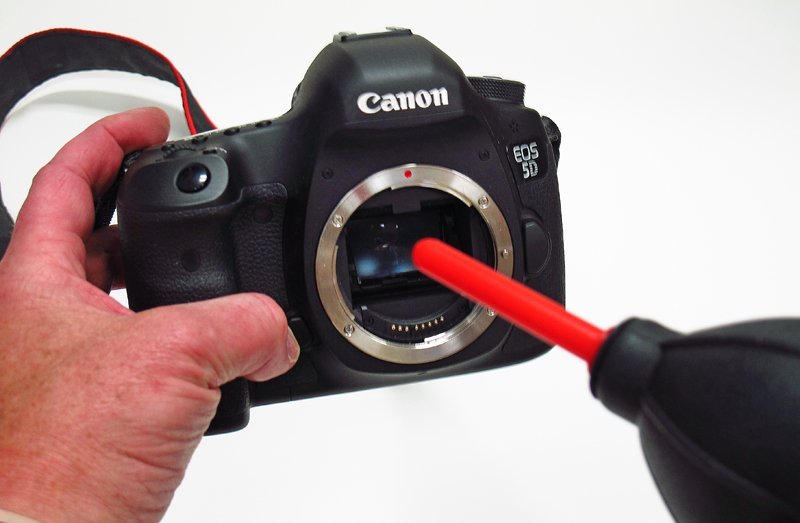
Using the blower, carefully blow air onto the sensor. Do this without making contact to avoid scratches.
5. Wet Cleaning
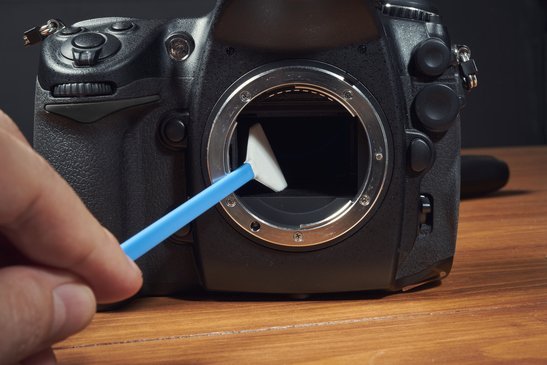
For stubborn dust or spots:
- Take a sensor swab and add a drop or two of the cleaning solution.
- Gently swipe the swab across the sensor in one continuous motion, moving from one side to the other. Do not rub or apply excessive pressure.
- Use the other side of the swab to swipe in the opposite direction if necessary.
6. Let The Sensor Dry
The cleaning solution should evaporate quickly. Wait a few minutes to ensure the sensor is dry before turning off the sensor cleaning mode.
7. Test The Sensor
To check if the cleaning was successful:
- Attach a clean lens.
- Set the camera to the smallest aperture (f/22) and take a photo of a plain white or light-colored surface.
- Examine the image for any spots or smudges. If they’re still present, repeat the cleaning process.
Final Thoughts
While routine cleaning of your camera lenses and occasional sensor cleaning can keep your equipment in optimal condition, always be gentle and patient during the process.
If you’re unsure or hesitant, it’s always best to consult a professional or send your camera for professional cleaning.
With proper care and maintenance, your camera will deliver sharp, clear images for years to come.