Learn the easiest way to balance voice and background music in Premiere Pro with this simple step-by-step guide!
Have you ever watched a video where the background music was so loud you could barely hear the person speaking? Or perhaps the music was so soft that it might as well not have been there?
If you want to ensure your viewers don’t face this issue, this guide will walk you through a simple Premiere Pro setting that makes your voice crystal clear while allowing background music to support your content without distracting from it.
The Problem With Just Reducing Background Music Volume
When adding background music to your video, you might think that lowering the volume is enough to make the voice audible.
However, there’s a catch.
Every sound has its own frequency range. Your voice and the background music both occupy certain parts of this range.
When their ranges overlap, even if the background music is quieter, your brain struggles to process the voice and music separately. This creates a muddled listening experience.
The Solution: Create A Frequency Dip With Parametric EQ
The key to fixing this issue is to adjust the background music’s frequency range in a way that it complements, rather than competes with, your voice.
Here’s how you can do it:
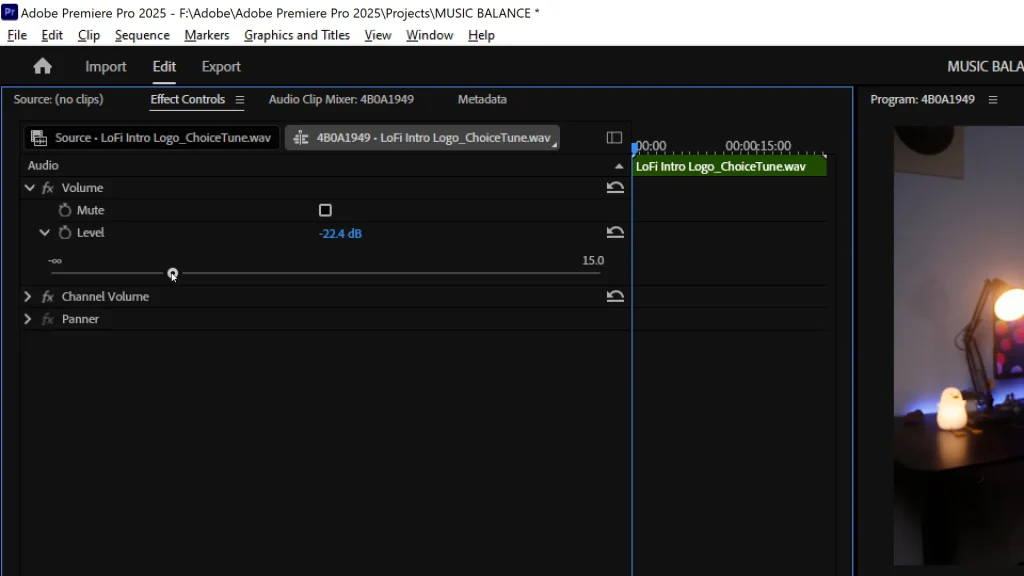
Step 1: Add Simple Parametric EQ To Your Music Layer
Go to the Effects panel in Premiere Pro. Search for Simple Parametric EQ and drag it onto your background music layer.
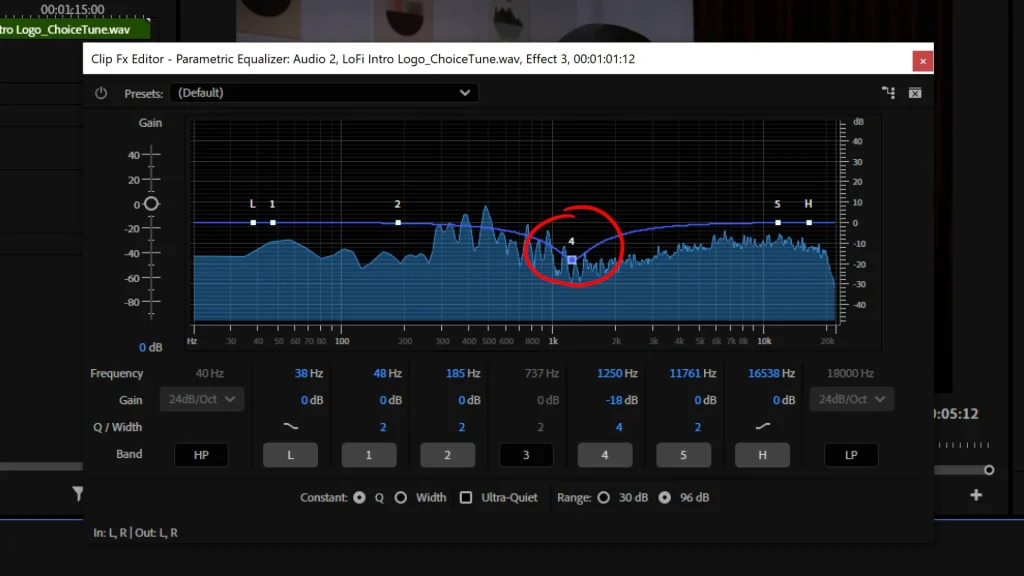
Step 2: Set The Frequency Center Point
The most significant overlap between human voice and music frequencies typically occurs in the range of 1000–1500 Hz. To target this range, enter 1250 Hz In the Center setting of Simple Parametric EQ.
Step 3: Adjust The Frequency Range
To define how much of the frequency range you want to affect. Use the Q setting. The ideal value is 4, which covers a broad vocal range.
For some music, you might need to increase this to 8 for better results.
Step 4: Create The Frequency Dip
Now, reduce the volume for the overlapping frequency range.
In the Boost setting, set the value to -18 dB. This will create a dip in the background music specifically in the overlapping range.
Step 5: Adjust Overall Music Volume
After making these adjustments, reduce the overall volume of the music track to ensure it doesn’t overpower the voice. Set the music volume to -10 dB or adjust as needed based on your voice levels.
Save Your Settings As A Preset
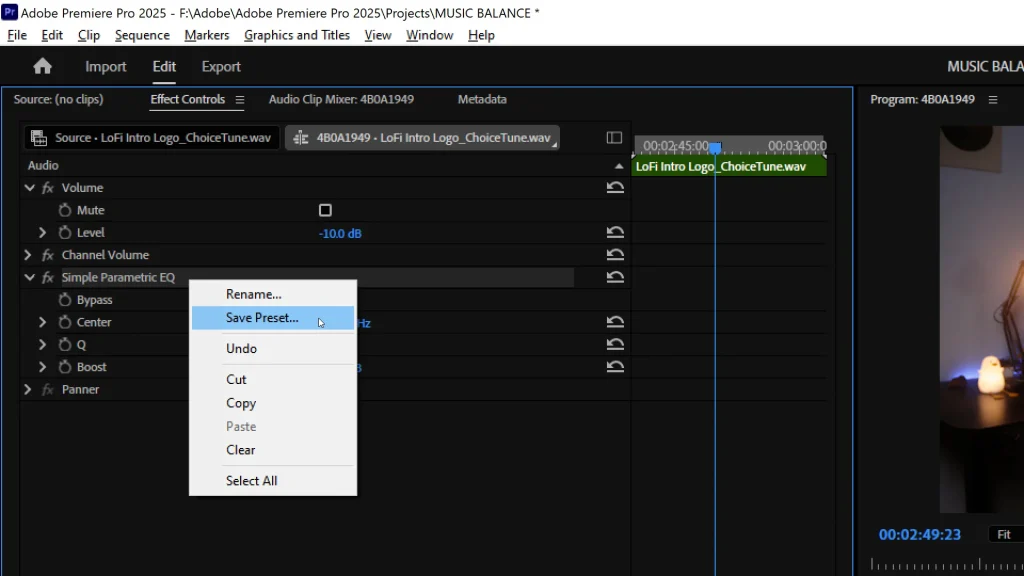
To save time for future edits:
- Right-click on Simple Parametric EQ in the Effect Controls panel.
- Select Save Preset and give it a name (e.g., “Voice-Friendly Music”).
Next time, simply drag and drop this preset onto your music layer to instantly balance the audio.
Why This Technique Works
This method focuses on the specific overlapping frequencies, leaving the rest of the music untouched. It’s like turning down just one instrument in a band so the singer’s voice can shine.
By doing this, your videos will sound professional and engaging.
Final Thoughts
This small adjustment has been a game-changer in my editing workflow. While the setting is simple, just as its name suggests, it creates a huge difference in the audio quality of your videos.
If you found this tutorial helpful, don’t forget to share it with your fellow video editors.
Also, check out: