


Aspect.app is a web app that can help you build websites with pre-made elements. It’s the easiest way to design and create static web pages.
Only a professional web developer can understand how complicated and time-consuming is the entire Web Development Process.
As a beginner, you need to learn and practice a number of front-end and back-end programming languages, and design tools, and understand colors, and typography.
This start-from-the-scratch approach to creating websites is suitable for people already working as web developers or those who aspire to be one.
However, there are far easier ways for the NOT SO TECHY people to design and create web pages.
The r/Design subreddit on Reddit is an awesome community of talented designers. Its feed is a constant stream of new ideas and innovations.
r/Design community member Tshepo Mohlala created ASPECT.APP – a web app that lets you draw a website and download the HTML files to publish on a web server.


Aspect.app is an easier alternative to tools like Webflow and WordPress, which get too complicated. It’s a more flexible alternative to tools like Squarespace and Wix, which force you to use rigid layouts.
How To Use the Aspect.app
Creating web pages with Aspect.app is pretty straightforward.
There are a number of templates to choose from that acts as a starting point. Or you can simply create a blank project and create everything on your own.
To demonstrate how easy Aspect.app is to use, let’s create a new blank project. We are going to design and create a static webpage that looks exactly like Google’s homepage.

As you can see, I’ve broken down Google’s homepage layout into 6 different sections.
Let’s take a look at how we can use Aspect.app to create all the different sections and bring our Google homepage lookalike to life.
1. Menu Items
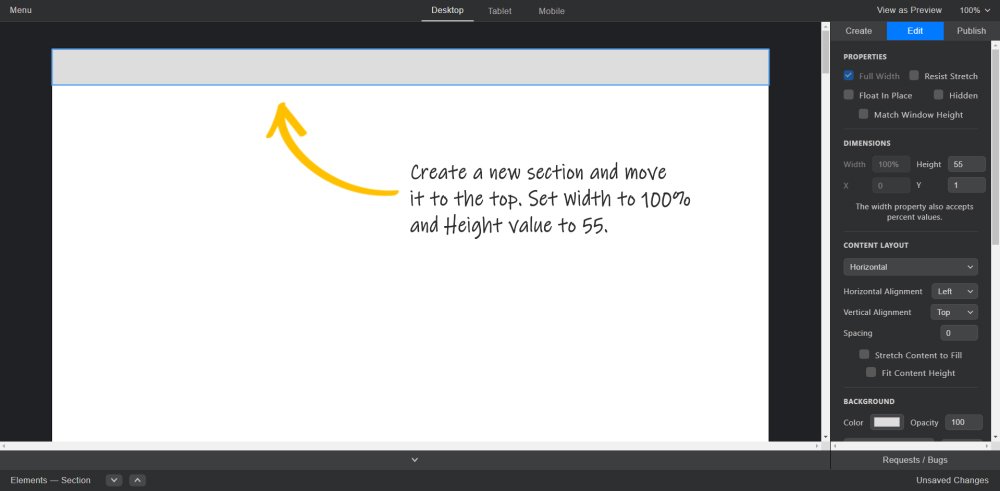
We’ll start off by creating a new section as it will act as a container to keep the content inside the maximum width, i.e. 1400px.
On the right side toolbar, click on Create > Section. Then using our mouse, we’ll create a new section by drawing a box on the black page.
We’ll move the section at the top of the page and set its Width to 100% and Height value to 55.
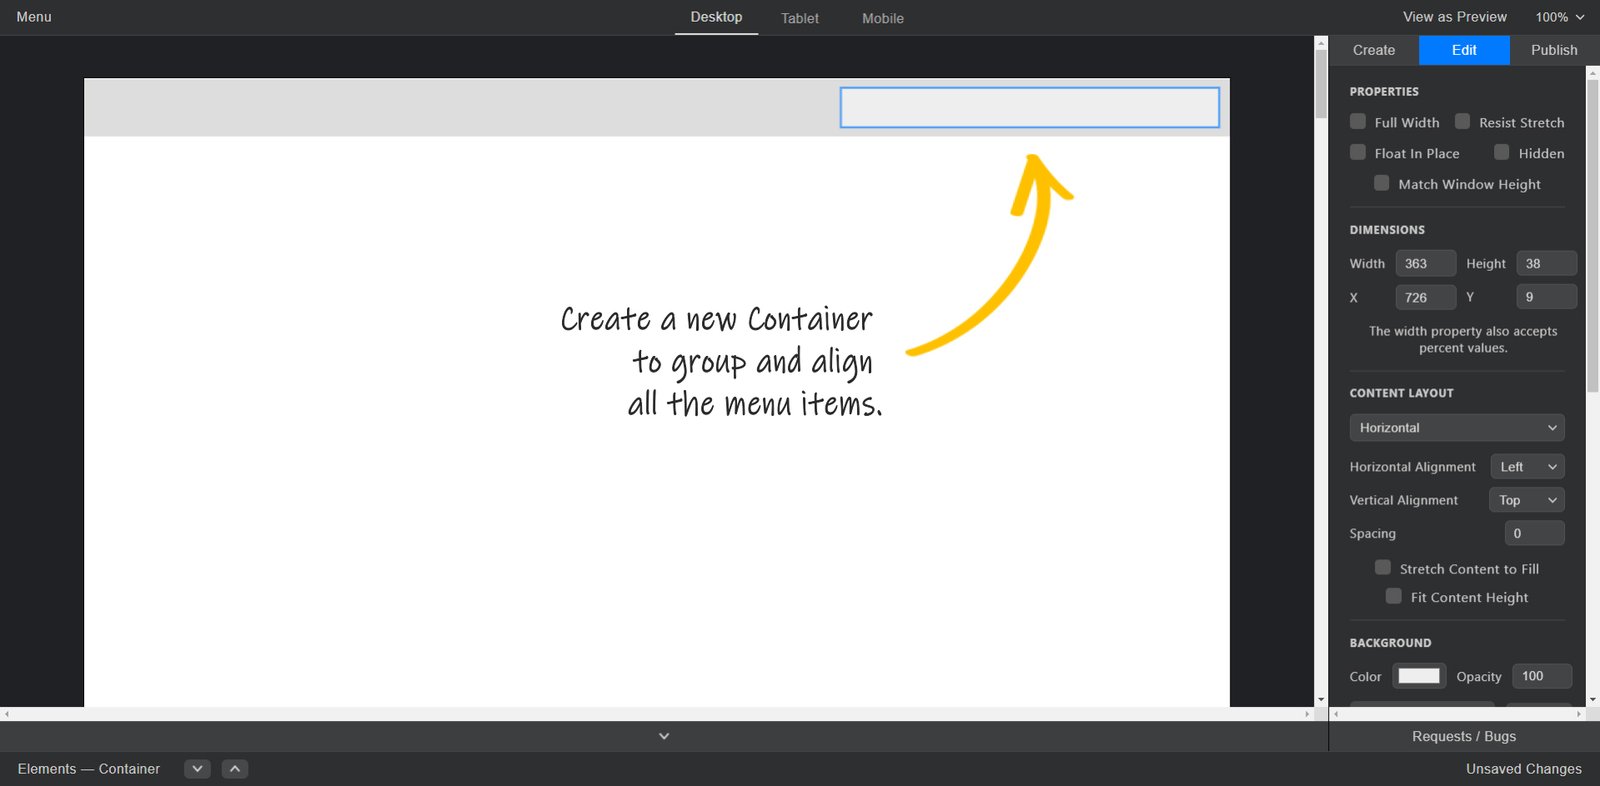
Inside the section, we are going to create a Container and align it to the right. This container will be used to group and align our menu items.
To create a container, we’ll go into Create > Container and draw a container as shown in the image below.
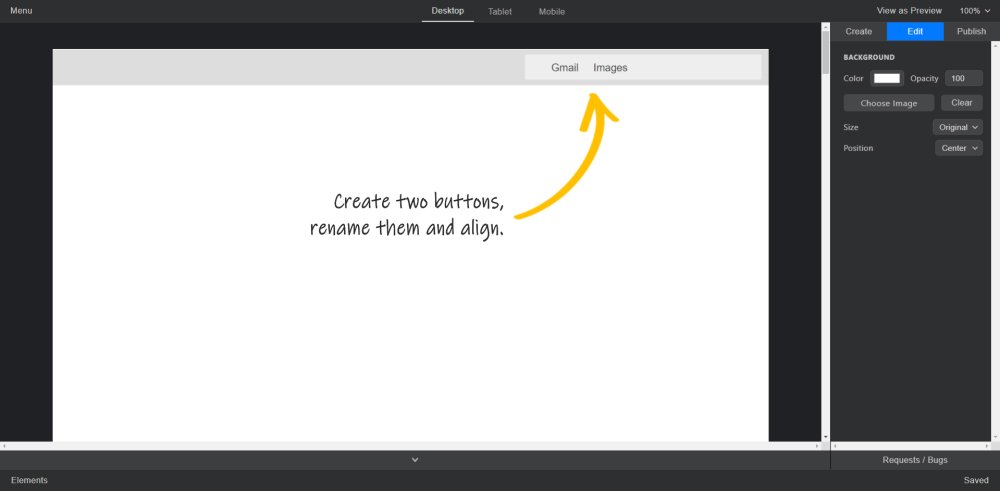
The next step is to create the menu items that include a hyperlink to GMAIL and GOOGLE IMAGES, a dropdown menu icon, and a SIGN IN button.
To create the first hyperlink, click on Create > Button and draw a button inside the container.
Double-click on it and rename the button as Gmail.
To create the second hyperlink, select the Gmail button we just created and hit CTRL + D on the keyboard to duplicate it. Then double-clicking on it will allow us to rename it as Images.
Next, we’ll align the two buttons as shown in the image.
We can select the buttons and customize the font properties as needed. However, for this demo, we’ll leave things to default.
The second thing on our list is the dropdown menu icon. I first downloaded the image file from icons8.com, then created a new image element via Create > Image.
The image element lets you import any image into the workspace. You can change the image properties such as scale, background color, and more using the right toolbar.
Next, I positioned the icon next to our hyperlink buttons, similar to the original Google homepage.
![]()
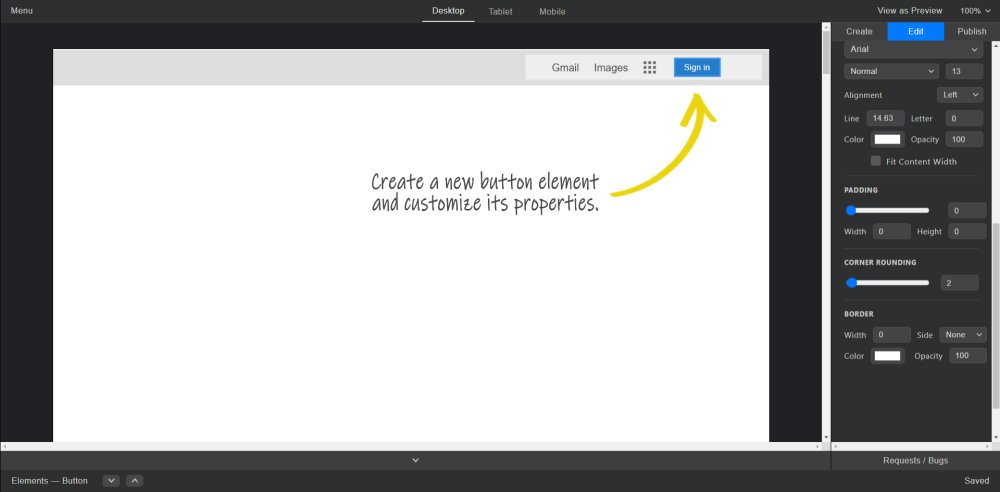
Last in the header is the SIGN IN button. We can again use the Create > Button element, similar to what we did while creating the two hyperlink buttons.
However, we need to customize the background color, text color, and corner rounding value of the SIGN IN button.
I used the hex code #247DCC (Almost Blue) as the background color, white for the text, and changed the corner rounding value to 2.
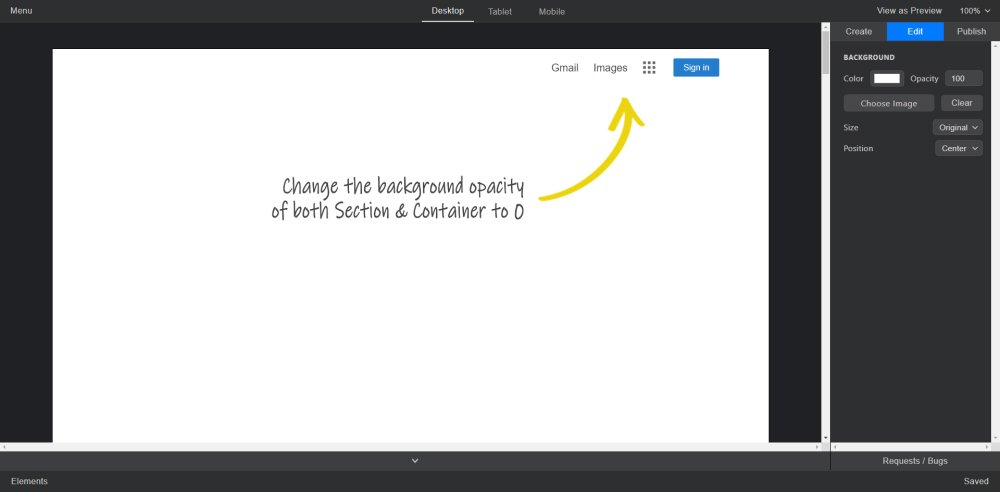
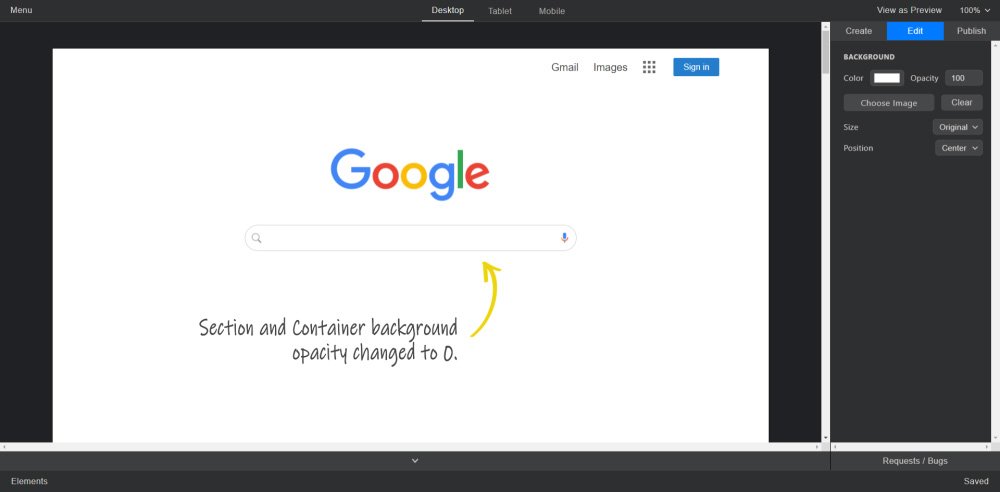
The last step is to change the background opacity value of both Section and Container to 0. This will help us achieve the final look of the menu items.
Now that we have our header and menu items in place, let’s move on to the next part and create the logo.
2. Google Logo
Creating the Google logo is quite simple. First, we will create a new section and within that a new container as shown in the image below.

Next, we’ll download the Google logo’s PNG file and import it into our workspace by creating a new image element from the right toolbar.
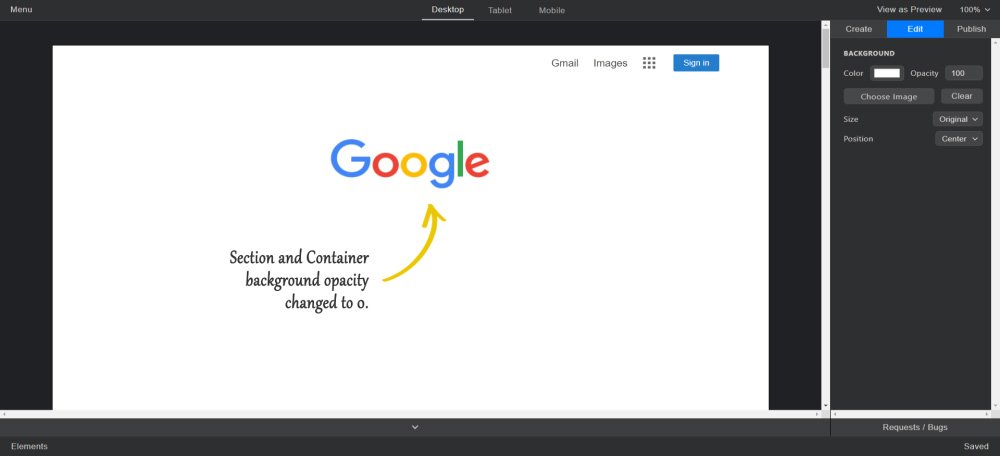
Position the Google logo at the center of the container we created in the last step and bring its background opacity value to 0.
![]()
The last step is to change the background opacity of both the Section and Container to 0 as well.
As you can see, we now have our menu items and Google logo in place. The next section is creating the SEARCH INPUT bar. Let’s do it.
3. Search Input
Aspect.app has an input element that can be used to create forms. In our project, we’ll use this element to create the Search Bar.
We’ll again create a new Section and within it a new Container.

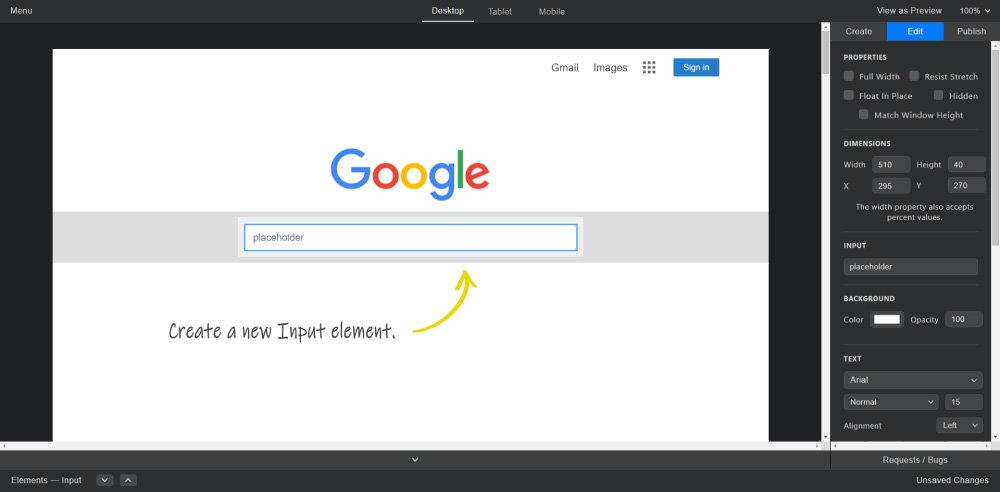
Now, let’s create a new input element by going into Create > Input and scaling it to look like the original search bar.
Next, we need to customize the input element. Google’s search bar has round corners and no placeholder text.
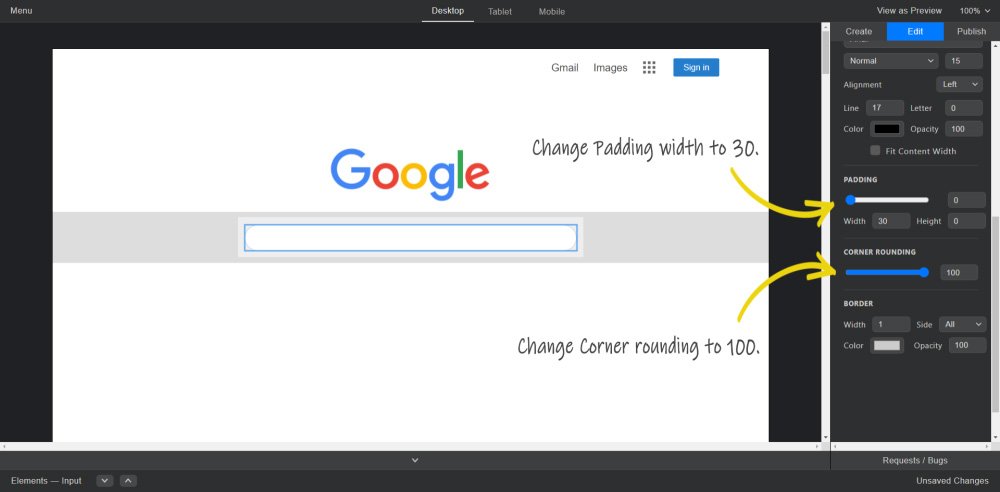
Therefore, we will select the input element and edit its properties. Firstly under the INPUT setting, we will delete the existing text ‘PLACEHOLDER‘. Next, we will change the corner rounding value to maximum and padding width to 30.
Changing the padding width value will give us some room on the left and right side of the search bar to place a search and microphone icon respectively.
I once again downloaded the icons from icons8.com, created two new image elements, and imported both the icons in place.
The last step is to bring down the opacity of the Section and Container to 0.
And this concludes our Google search bar. Let’s move on to the next section – BUTTONS.
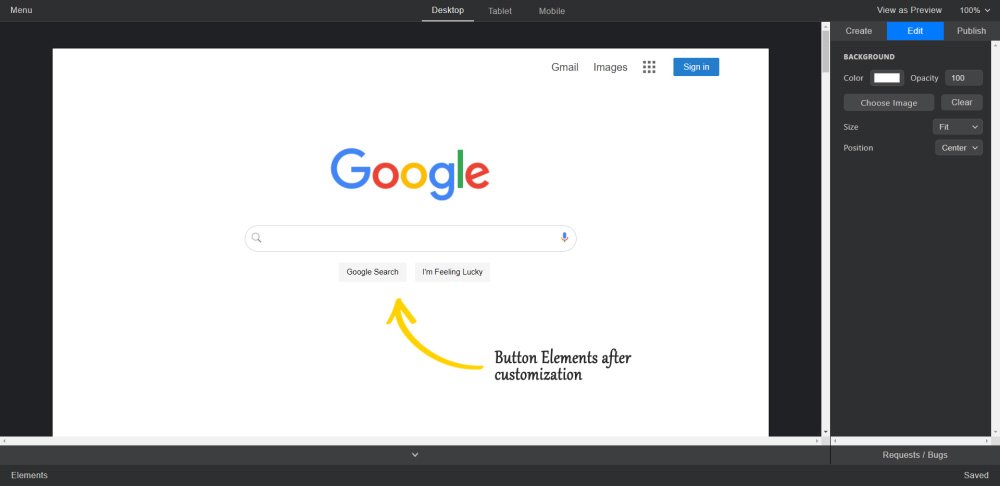
4. Buttons
As usual, we’ll create a new Section along with a Container. Then for the buttons, I’ll use 2 new Button elements and customize them accordingly.
I will skip the process of explaining how to create Sections and Containers as I’ve done that multiple times in the previous sections.
For customizing the buttons, I changed their background color to hex code #F5F5F5 and corner rounding to 2.
After changing the Section and Container background opacity to 0, this is what our buttons look like.
5. Language Selection
For the language selection, we’ll use one text element for the text ‘GOOGLE OFFERED IN‘ and multiple button elements for the languages.
After creating the required Section and Container, we’ll go into Create > Text and create our text element.

Next, we will create a button for languages, customize its appearance by changing the background opacity to 0 and font color to blue, then duplicate it multiple times for different languages.
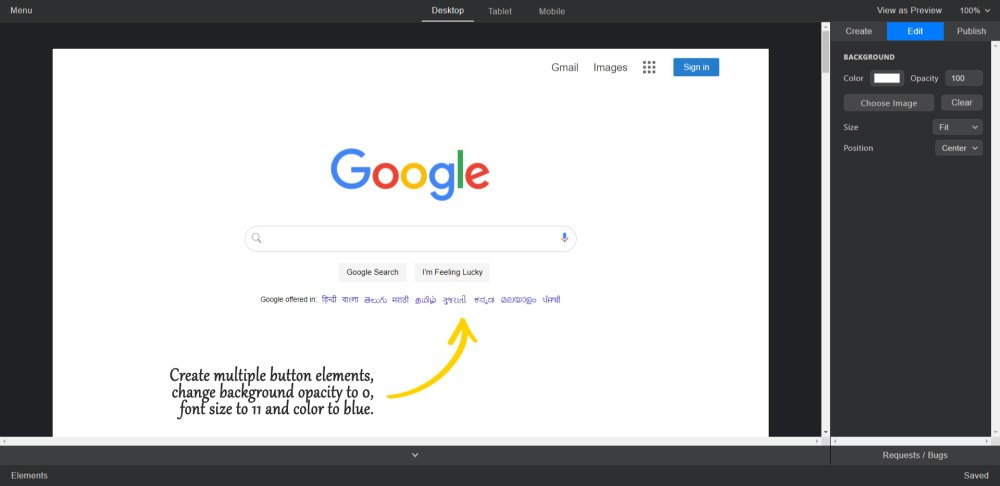
After changing the Section and Container opacity, we have our language selection in place.
6. Footer
The FOOTER is made up of two different sections stacked one below the other. Other than that, I just used the button elements to create all the hyperlinks.
You can see what the FOOTER looks like in the image below.

I have also customized the background color of SECTION to look exactly like the Google homepage footer.
Downloading And Publishing
You can see how easily and quickly we’ve designed and created a webpage using Aspect.app. We can either download this webpage code and modify it further or publish it directly on the web with the Aspect.app.
Conclusion
When we hear the word Web Development, the first thing that usually comes to our mind is coding. LOTS OF CODING. However, there are tools in the market that let you create websites without writing a single line of code.
One such tool is ASPECT.APP – an easy alternative to WordPress or Webflow, which are way too complicated. Aspect.app is a web application that can help you create static web pages easily with pre-made elements.
It is a great tool to design the front end of a website. Once you are happy with your design, you can download the code or publish it directly on the web with Aspect.app.
To test out this web app, I created a new blank project and went on to create a webpage that looks like Google’s home page.
Here’s the result:
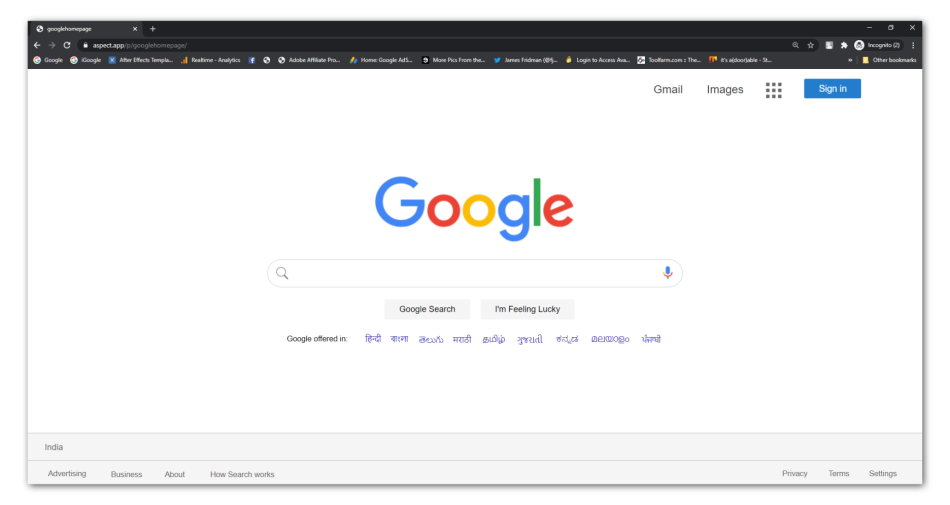

The entire process was quick as the Aspect.app interface is very easy to understand. Please note that this tool is still in its early development phase and will evolve over time.
DO KEEP AN EYE ON IT.