


A complete guide on how to shoot and edit cinematic travel videos. Read this article before you pick your camera up and start the journey.
In the mid-90s, my father had a film camera, strapped on his leather belt. He took it everywhere we traveled to capture the memories and experiences along the way.
Photographic cameras have come a long way since the days of film cameras. Today, our cameras can click and store thousands of photographs on a single memory card.
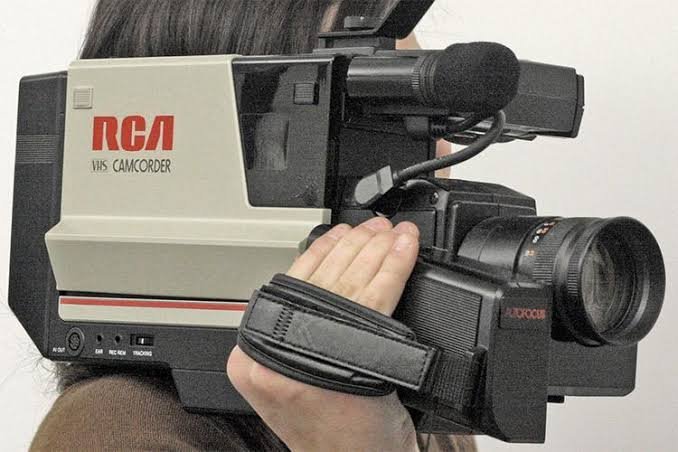
Although the film cameras were small and pocket-friendly, video cameras/camcorders were bulky and difficult to carry around.

As a result, cinematic travel videos weren’t popular at all.
The advancement in camera technology and the introduction of digital point-and-shoot cameras gave us the ability to click pictures and record videos on one single, pocket-friendly camera.
Advanced cameras with automatic focus and variable aperture, zoom lenses, and exposure systems soon captured the market.
But up to the end of 2011, point-and-shoot digital cameras took 44 percent of photos, down from 52 percent in 2010, while the use of camera-equipped smartphones for taking photographs increased from 17 percent to 27 percent.
Year by year, the sale of point-and-shoot cameras declined by 17 percent.


Although there was an increase in cameras having optical zoom greater than 10x by 16 percent. Travel Videographers were showing great interest in them because of their superzoom abilities.
Today, we have the TRUE DIGITAL CAMERAS that are affordable to professional photographers and average consumers.
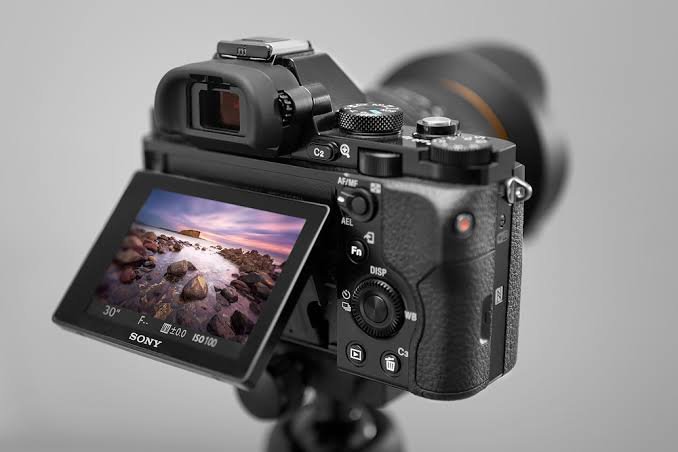
The newest and latest models of digital point-and-shoot cameras like the SONY RX100 series are capable of recording high-quality and detailed 4K videos. Since they are compact and easy to carry around, more and more people are buying and using them to make cinematic travel videos.
Let’s take a look at what it takes to create ULTIMATE CINEMATIC TRAVEL VIDEOS.
THE PRE-PRODUCTION PROCESS
The pre-production process involves a ton of planning before you actually go out and start shooting videos.
Choosing The Right Camera For Cinematic Travel Videos
If you’ve never bought a camera or you’re looking to upgrade from a current model to something more suitable, you might be unsure what to go for. This is particularly confusing now as many compact cameras, compact system cameras, and DSLRs can all be bought for a reasonably similar price.
It’s useful to start by thinking about how you intend to use your camera. If you are a frequent traveler who hates carrying extra luggage and always wants something in your pocket or over your shoulder.

Or maybe you’ll be happy with something that’s slightly larger if it means more control and better quality results.
You should also think about what you intend to do with your videos once you’ve recorded them. If you only ever look at your videos on a computer and you plan to do little or no post-production, you may be better off with a high-quality compact camera that you can put into your pocket.
You can get these now with a range of lenses from prime lenses to zoom lenses that will cover everything from wide-angle to telephoto shots.
If you frequently travel you might want to go for a camera with a wide zoom lens.
If you do plan on doing any post-production, look out for cameras with LOG mode as this will give you a better dynamic range.
Compact systems or mirrorless cameras are great for those who want maximum quality.
Many of these offer the same kind of sensors as DSLRs and a compatible range of high-quality lenses and accessories.
Go for a camera with a tiltable screen. These allow you to move them around to a range of positions so that you can always get a good view of the scene even when you move your camera.
Get Inspired By The Best Travel Vloggers
Before you pick your camera up and start the journey, RESEARCH. It’s always better to learn from the experts. YouTube has a number of channels that are dedicated to travel videos.
Beautiful Destinations

The first channel I’ve come up with is called BEAUTIFUL DESTINATIONS which is a source of daily travel and lifestyle inspiration for people around the world. Here, you will find breathtaking cinematic travel videos from various destinations around the world.
Sam Kolder

With over a million YouTube subscribers, Sam Kolder is a well-known filmmaker and editor who specializes in beautiful travel videos. Visit Sam Kolder’s YouTube channel to get inspired by his amazing style of cinematic travel videography.
JR Alli

JR Alli is a 19-year-old aspiring filmmaker from Toronto, Canada with over 100K subscribers on his YouTube channel. Alli makes cinematic travel films but what stands out is his unique editing style. With lots of transitions, neon light effects, and voiceovers, JR Alli’s videos are a great inspiration for aspiring travel vloggers and filmmakers.
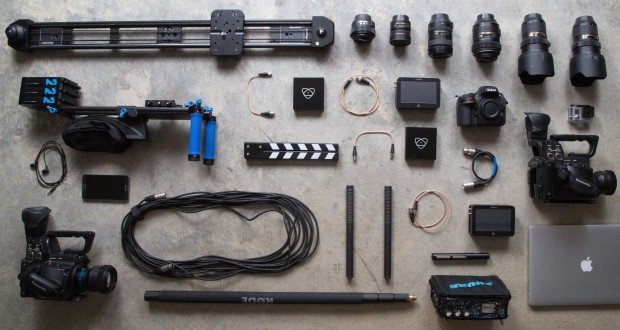
Camera Gear You Need For Creating Awesome Cinematic Travel Videos
Firstly, the most important question you need to ask when packing gear for your travel video is “WHAT KIND OF VIDEO I AM GOING TO MAKE?” Before you start packing, plan your shots in a notebook.

Am I going to do time-lapse? If yes, then carry a tripod. A remote shutter for the hyper-lapse.
Pack your camera slider if you want to include some smooth-moving shots in your travel video. Or maybe just a monopod to support your handheld shots.
If you own a drone, carry it along. Drone shots increase your production value by 50%.
What’s In My Camera Bag?


Sometimes, I record my travel videos entirely on a DJI Osmo. However, my camera bag includes:
- Canon 5D Mark 4 & Canon 60D with 2 batteries.
- DJI Osmo with 3 batteries.
- Intervalometer for hyper lapses.
- Variable ND filter for DJI Osmo.
- Canon 50mm, 18-135mm, 70-200, 150-600mm lenses.
- LG 360 Camera.
- Tripod.
- Monopod.
- Camera Slider.
- 3-4 SD cards and 2 microSD cards.
- Chargers and cables.
I am constantly buying new stuff and updating my existing equipment to match up with the current tech. Budget is a limitation, but it’s not a reason for me to stop growing.
THE PRODUCTION PROCESS
Once you carefully plan out all your equipment, gear, and what and how to shoot your videos, it’s time to start shooting.
Let’s take a look at all the essential things you need to follow and carry out in order to start recording high-quality cinematic travel videos.
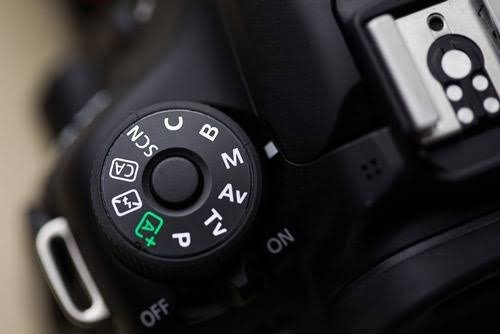
Check Your Camera Settings
A travel video is a compilation of all your memories, experiences, fun, and joy blended with creativity and crazy ideas. Don’t get too involved in the technical aspects of filming. You are out there to have fun.
Although there are a few camera settings you need to check before you hit the record button.
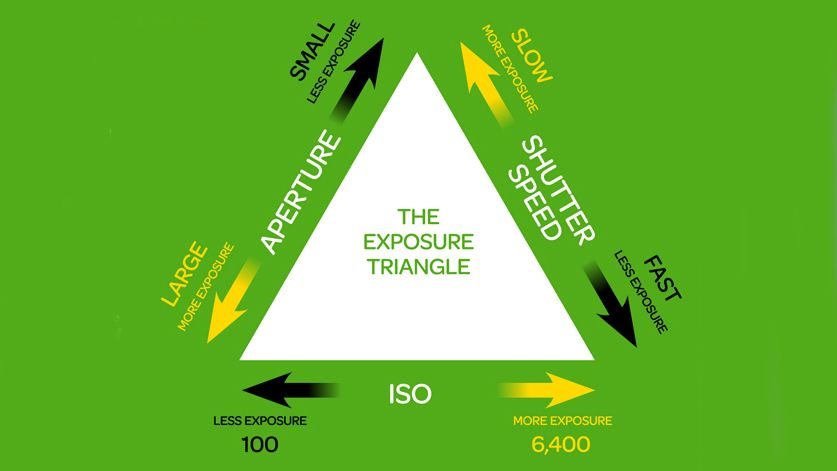
Both my DSLR and DJI OSMO offer a manual mode. That means I can manually dial in my ISO, aperture, and shutter speed to get the right amount of exposure.

It helps to gain much more control over the look and feel of every video I capture.
Also Read: 5 Web Applications To Learn The Basics Of DSLR
But if you are not familiar with the manual mode, just go with the AUTO or learn everything you can about the Exposure Triangle to go full MANUAL.

Shoot LOG For Better Post Production
Log footage is an important part of my post-production workflow. Log color space retains the most dynamic range of information from the camera sensor.
Pretty much all camera manufacturers offer their own Log Curve:
- Canon Log
- S-Log(Sony)
- D-Log(DJI)
- LogC(Arri)
- Blackmagic Log
- Red Logfilm
Log footage looks flat and desaturated.


It needs to be color-graded in the post. The best and most effective method is by using LUTs (lookup table). LUTs are color presets that you can apply to video footage to create a stylized look, feel, and tone.
Use Your Smartphone To Shoot Travel Videos
You don’t always need a DSLR camera to vlog your journey. Your smartphone is enough to do the job. With the right types of equipment and applications, you can record high-quality videos from a smartphone.
Use A Stabilized Gimbal
Trust me, it is very difficult to record stable videos from a smartphone. You can use After Effects or Premiere Pro’s warp stabilizer to stabilize your videos in the post but the results aren’t natural enough.
Moreover, it is a time-consuming process. To deal with the issue, I suggest purchasing a motorized handheld stabilizer.
DJI OSMO MOBILE 6 is one of the best mobile stabilizers in the market. It offers other software enhancement features to shoot cinematic travel videos with just a smartphone.
Ditch Your Camera App! Use Filmic Pro
Filmic Pro is an Android and IOS application that gives you total control of your smartphone camera. With its manual mode, you get full control over focus, exposure, white balance, and variable zoom speed.
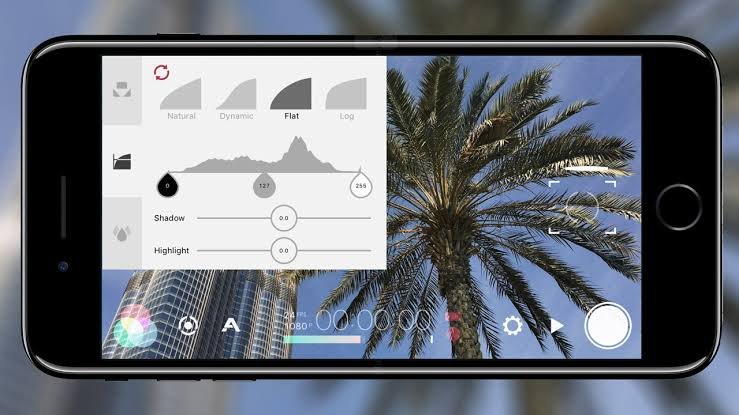
Filmic Pro can offer the capability to increase your default camera bitrate to extreme data-rich 100mbps at 4K. And, you can also shoot in a LOG color profile.
With Filmic Pro, you can customize the frame rate from 1-240fps for slow and fast motion. Other features include audio meters, gain control, stereo support, and headphone monitoring.
THE POST-PRODUCTION PROCESS
This process involves editing and rendering the final travel video. This process is the most important of all as it is the outcome of all your efforts and hard work done during the pre-production and production process.
Choosing The Right Video Editing Software
Each editing software has its own workflow and its own variations, and what you prefer will depend on how you work.
Video editing is an essential step in the production process of your travel videos. While there are many different paid and free video editing software available, it is important to consider your needs.
Only purchase the software that best fits your workflow. A buyer’s guide to choosing the right video editing software might help you in comparing different editing programs.
Make Your Cinematic Travel Videos Stand Out With Transitions
Make your cinematic travel videos stand out by paying extra attention to the transitions. Zoom, Slides, Rotations, and Glitches are the widely used effects in travel videos.
There are tons of automated plugins and presets to achieve such effects in Premiere Pro and After Effects.
1. Handy Transitions For Premiere Pro
With 250+ sales in a week, 1900+ Handy Transitions is one of the best and trending Premiere Pro templates. Fast preset previews make it convenient to choose a suitable preset. Select a suitable preset and drag it into your sequence.
2. 3333 Videolancer’s Transitions For After Effects
Lift your travel videos to the next level! Add to your video editing tools these super cool Target-Zoom and Pan transitions!
3. Seamless Transitions
With over 1000+ transitions and other presets. This Premiere Pro transitions pack is an all-in-one package. 5-star rating with more than 13,000 happy customers, seamless transitions pack is a one-stop solution to all your transition needs.
4. 4000+ All-In-One Transitions
This Library contains more than 1200 ready-to-use presets that can help you make your unique videos. Glitch, Panoramic, Roll, Twist, Glass, Light Leaks, Offset, Shake, Stretch, Split, Optics, Zoom, and many others. Each category contains different elements and creates a unique stylish look.
5. 1000 Filmmaking Presets For Premiere Pro
Filmmaking Library contains 1000 ready-to-use presets to help you create professional quality videos. Glitch, Panoramic, Roll, Twist, Glass, Light Leaks, Offset, Shake, Stretch, Split, Mirror, Color Correction, RGB, Transitions, Strobe FX, Text titles, Backgrounds Optics, Zoom and many others.
6. 700+ Seamless Transitions
Make your videos visually interesting and appealing with 700+ drag-and-drop transitions, slideshows, and video editing tools like camera zoom and pan.
Exporting The Highest Quality Travel Videos For YouTube
Your cinematic travel video is done and now you want to render it out and upload it on YouTube. You want to share your creativity, memories, and experiences with the world.


But before hitting the EXPORT button, make sure to go through the output settings and select the correct file format. There are some basic guidelines to follow to successfully upload your cinematic travel videos on YouTube.
Video
- Codec: I use H.264 which is a standard codec that balances high visual quality with minimum file size. It helps in minimizing upload and processing times.
- Frame rate: Maintain your video’s native frame rate when rendering it. Stick with a constant frame rate throughout your entire video. Choose a ‘constant’ frame rate instead of a ‘variable’ frame rate.
- Bitrate: Bit rate is responsible for the visual quality and file size. Experiment with different bit rates if your file is too large or you’re not satisfied with the quality. I usually go with 30 Mbps for 4K, 25 Mbps for 1080p, and 15 Mbps for 720p.
Audio
- Channels: For best results, I recommend 2-channel Stereo audio.
- Codec: For best results, I recommend using AAC-LC (low complexity) for the audio codec.
- Data Rate: For best results, encode your audio at a constant rate of 320 kbit/s.
- Sample Rate: For best results, set your audio sample rate to 48 kHz. If your working set is already less than or equal to 48 kHz, leave it as is.
ESSENTIAL TIPS FOR CREATING ULTIMATE CINEMATIC TRAVEL VIDEOS
And finally, to sum it all up, here are a few Travel Vlog Tips to make your travel videos the best that they can be.
- Understand Your Equipment: Know how the camera you are working with will impact the image you are getting. You need to understand how different lenses will allow you to achieve different shots.
- Slow And Fast Motion: Slow motion should only be used to emphasize a story. Don’t overuse it. If it doesn’t add to the story don’t use slow motion. The same can be said for fast motion.
- Challenge The Angles: Doesn’t matter if you have a GoPro or a Canon 1DX Mark 2. Whatever you are shooting with, make sure you are telling a different story than just the stand-and-shoot.
- Music, Music, Music: It makes all the difference. With music, you have the choice to evoke emotions in the audience based on the song you choose. There are many great websites to download royalty-free music and songs for your travel videos.
- Stabilize Your Footage: There are two ways to stabilize your footage. The first one is by using software like Warp Stabilizer. Use that with caution as sometimes it can do bad things to your footage. Second and the most recommended one is getting a stable video inside of the camera so that you don’t have to use that extra step. Just use a stabilized gimbal to achieve buttery smooth footage.
- Tell A Story: Keep in mind the story you want to tell and work on it. Don’t insert random travel clips all together over music. There should be a bit of continuity and flow that shows what’s going on in the video.
- Cut With The Music: Tell your story with the story. What I mean is when you put together your travel video, take your footage and a song of your choice, then make everything based around that song. Every time you get that very audible beat, that is a great indicator that this might be a good time to cut to the next clip.
It doesn’t matter what gear you have or how much experience you hold. Simply concentrate on the process. Enjoy what you do and learn something new every single day.
Filmmaking is a path with no destination. keep on getting better at filmmaking by exploring new techniques, skills, and ideas along the way.